

This article covers custom label designs using the PDF template and a 3rd party vector-based software such as Adobe Illustrator.
This method is not recommended for those who do not have design experience, and cannot be used with Canva or other non-vector-based design softwares.
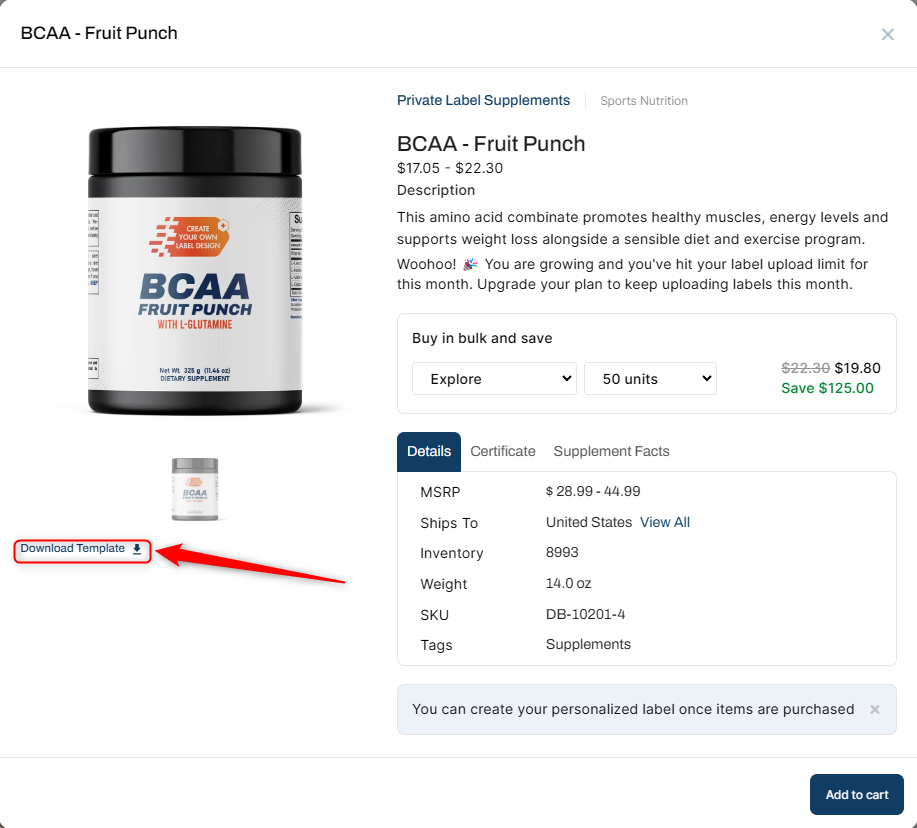
First, choose a product from the Catalog.
Once you select a product, click Download Template
This will open in a new tab with a PDF of the label template. You must open the PDF in a vector-based design software such as Adobe Illustrator to edit and view the layers.
 2. This template provides all the essentials: supplement facts, FDA claims, and more. Familiarize yourself with our Label Guidelines.
Important Note: Before submitting your labels for approval, you have the option to purchase the Minimum Order Quantity (MOQ) for your inventory.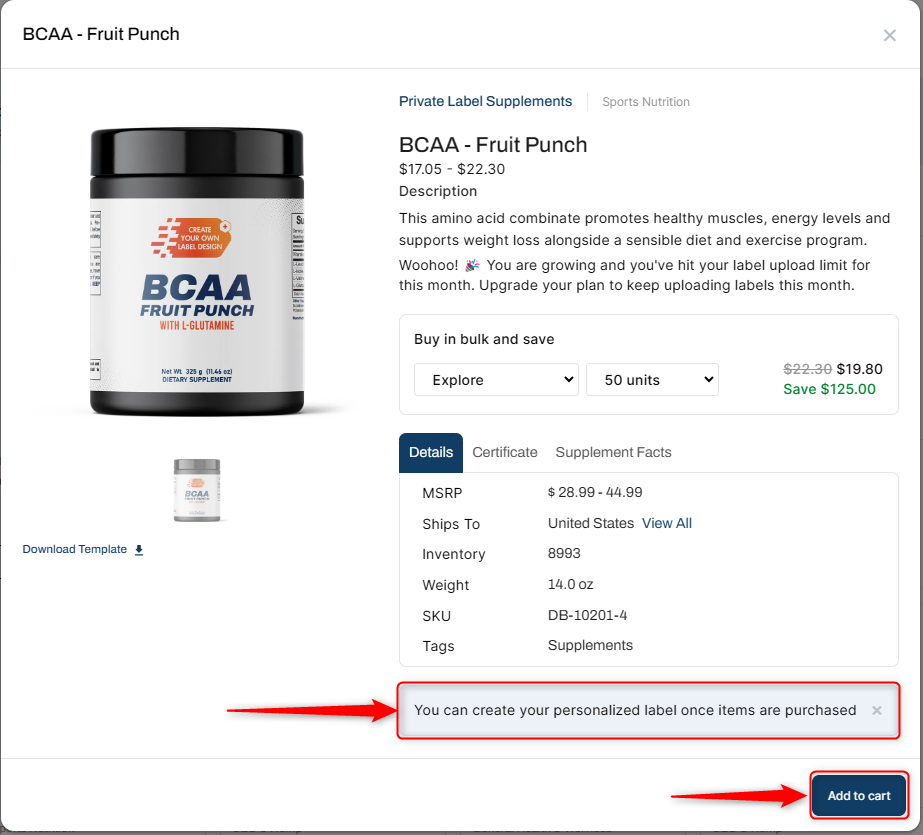
3. After your purchase, go to My Products > My Products then click "Edit" button. Here, every detail ensures your design aligns with the FDA and cGMP regulatory standards.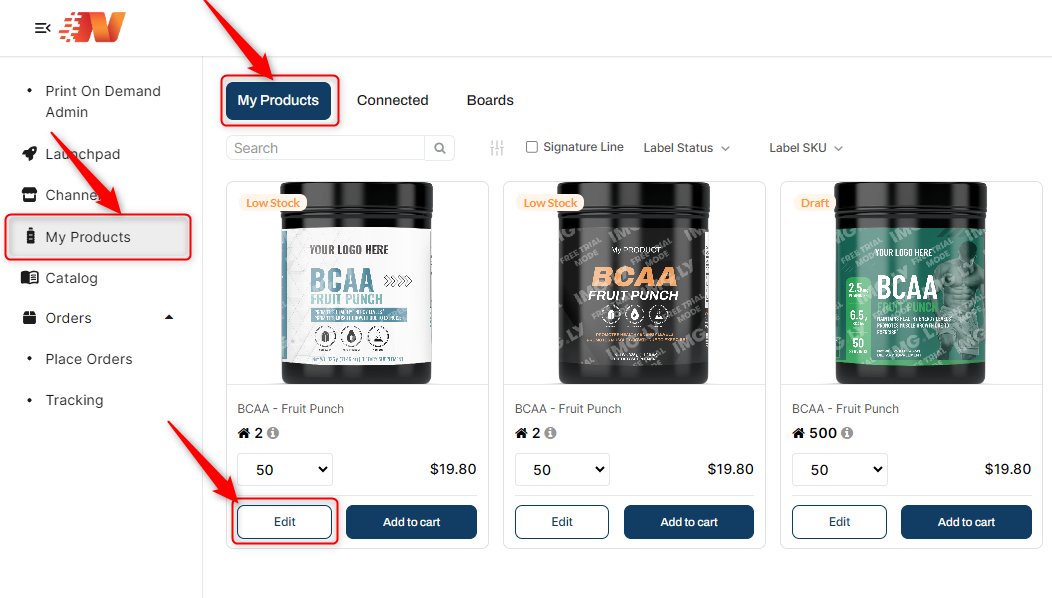
Need Help with finding key benefits that meet these standards for your product? Not a problem, you can visit our public-facing product catalog and search for your product to find pre-approved Key Benefits. Note that all claims on your label MUST meet FDA and cGMP guidelines to be approved.
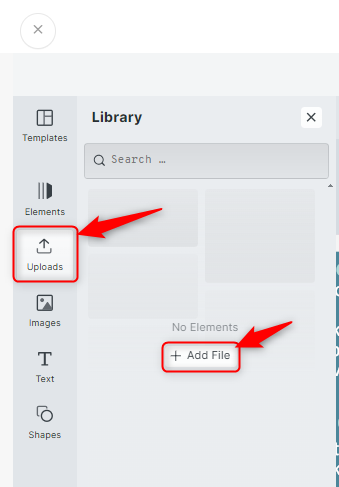
4. Once you have your file ready and have confirmed it meets all our guidelines, you will then be routed to User Supplements Page and you can click "Customize Label" to upload your document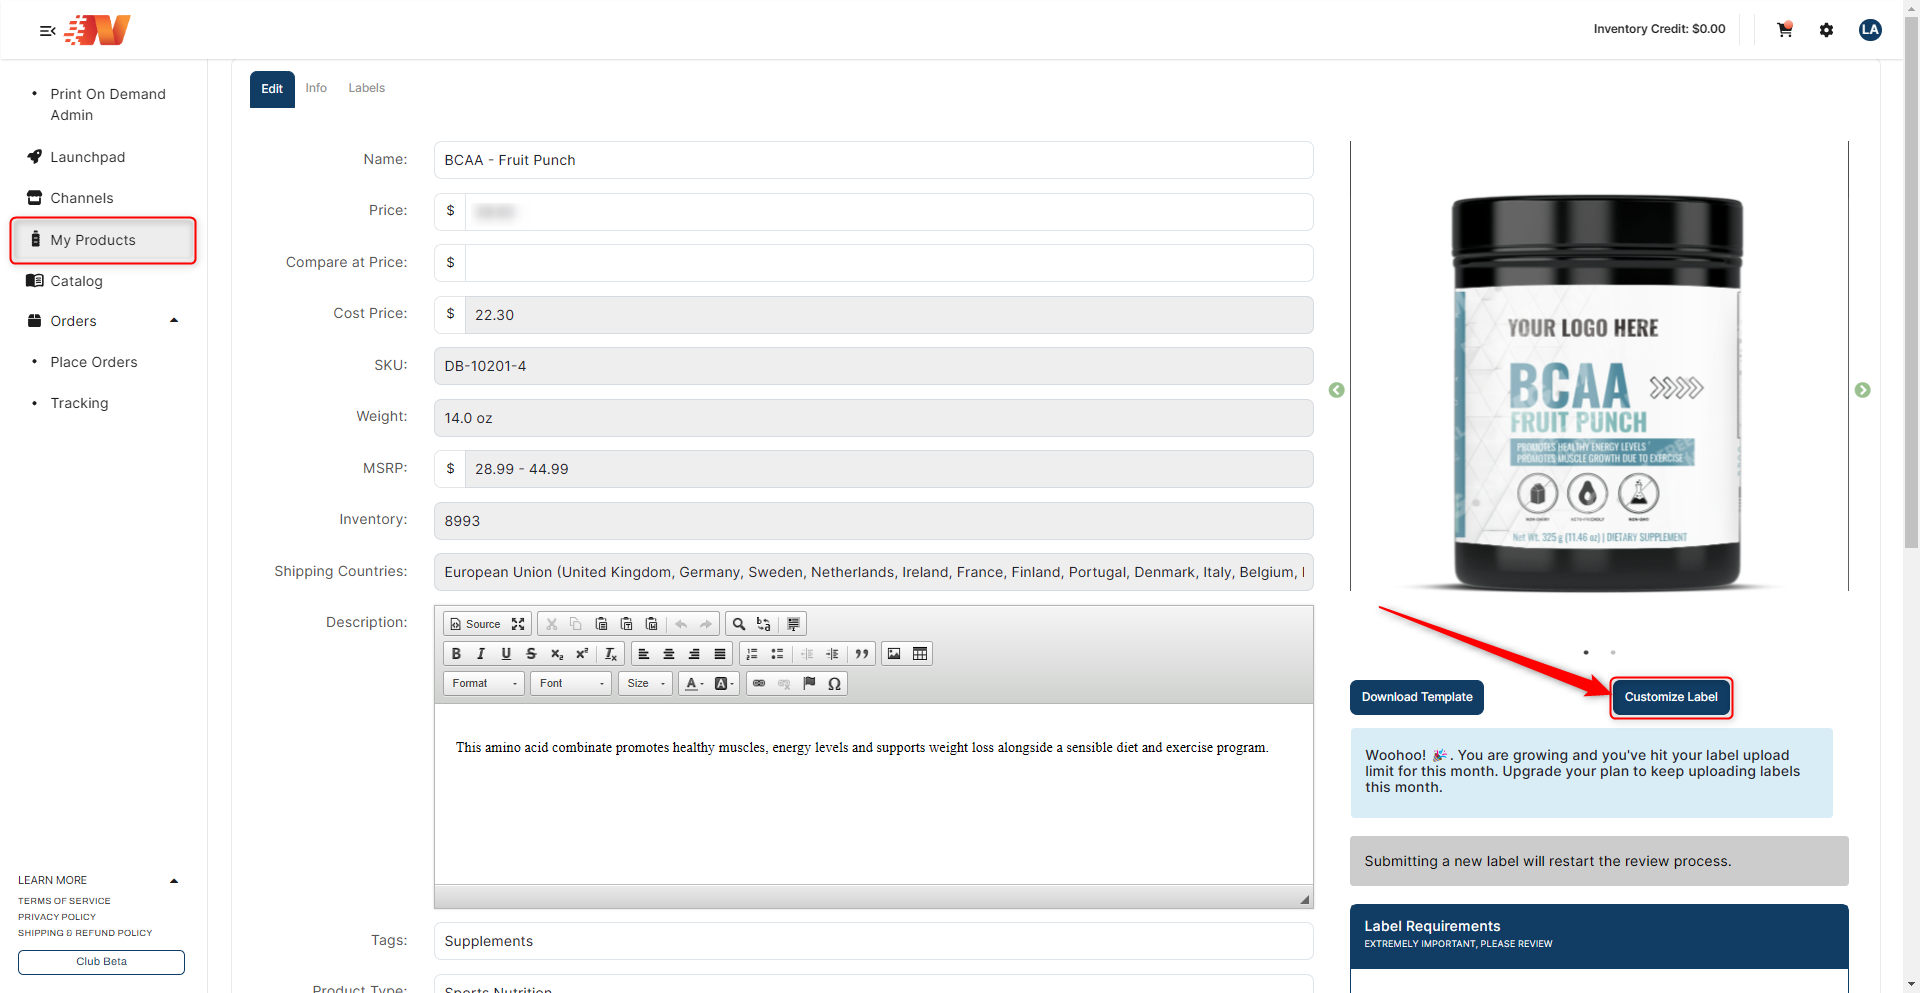
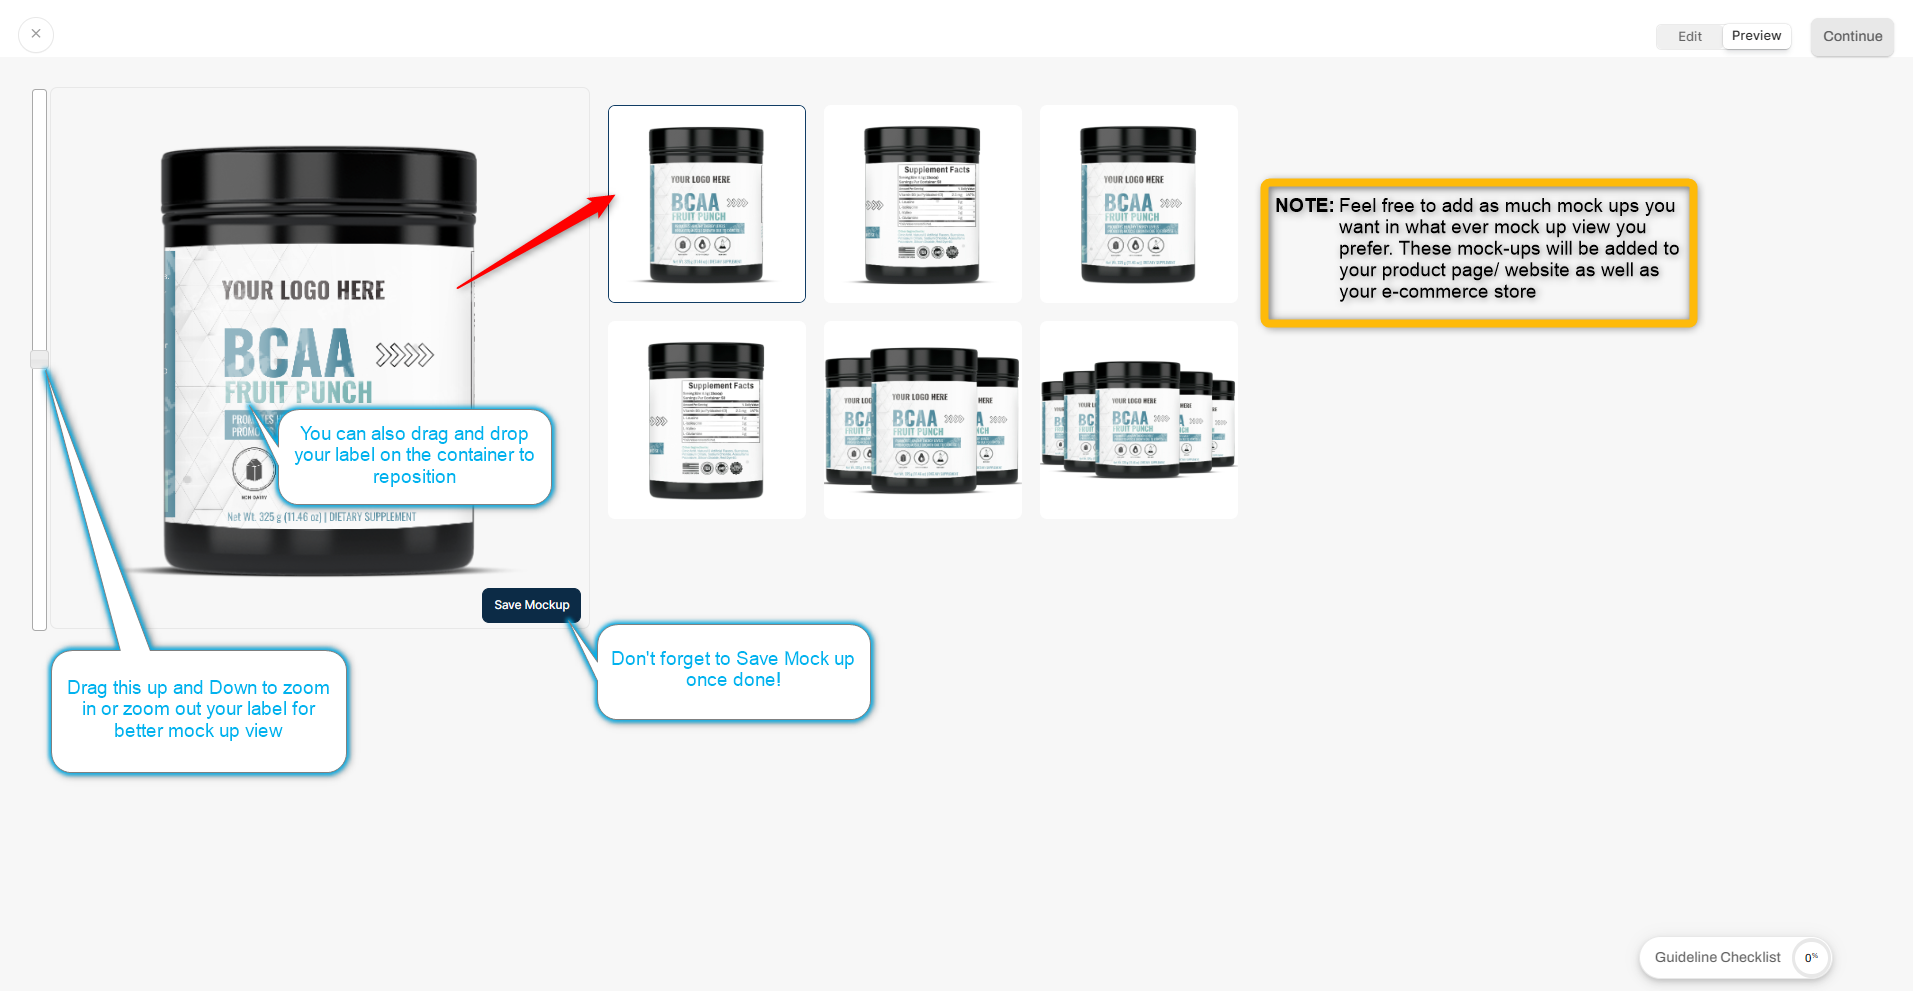
5. Once uploaded, you'll land on a review page. Adjust your label to fit the product preview just right and remember to hit 'Save Mock-up'.
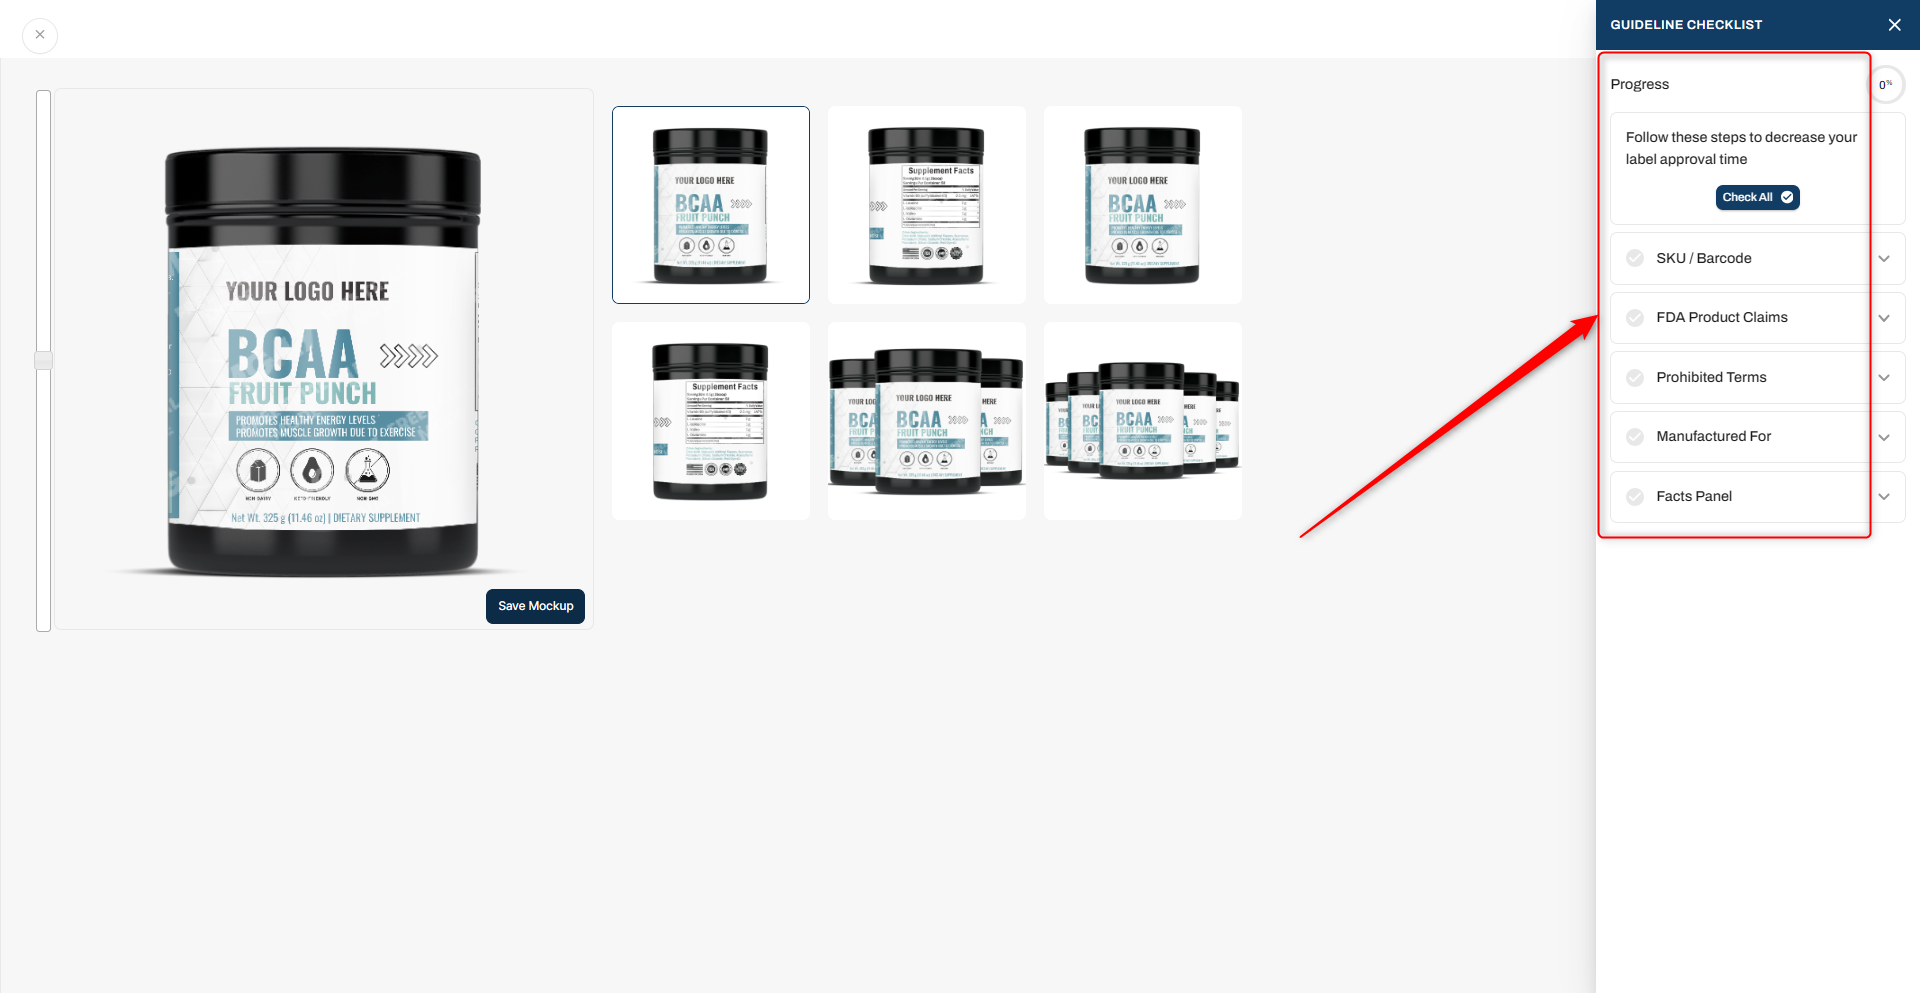
6. Your next focus? The guideline checklist is on the bottom right. Each item on this list ensures your label is primed for approval. As you confirm completion for each item, your progress will update. Reach 100%, and you're all set to move forward. 
7. “Click 'Continue'.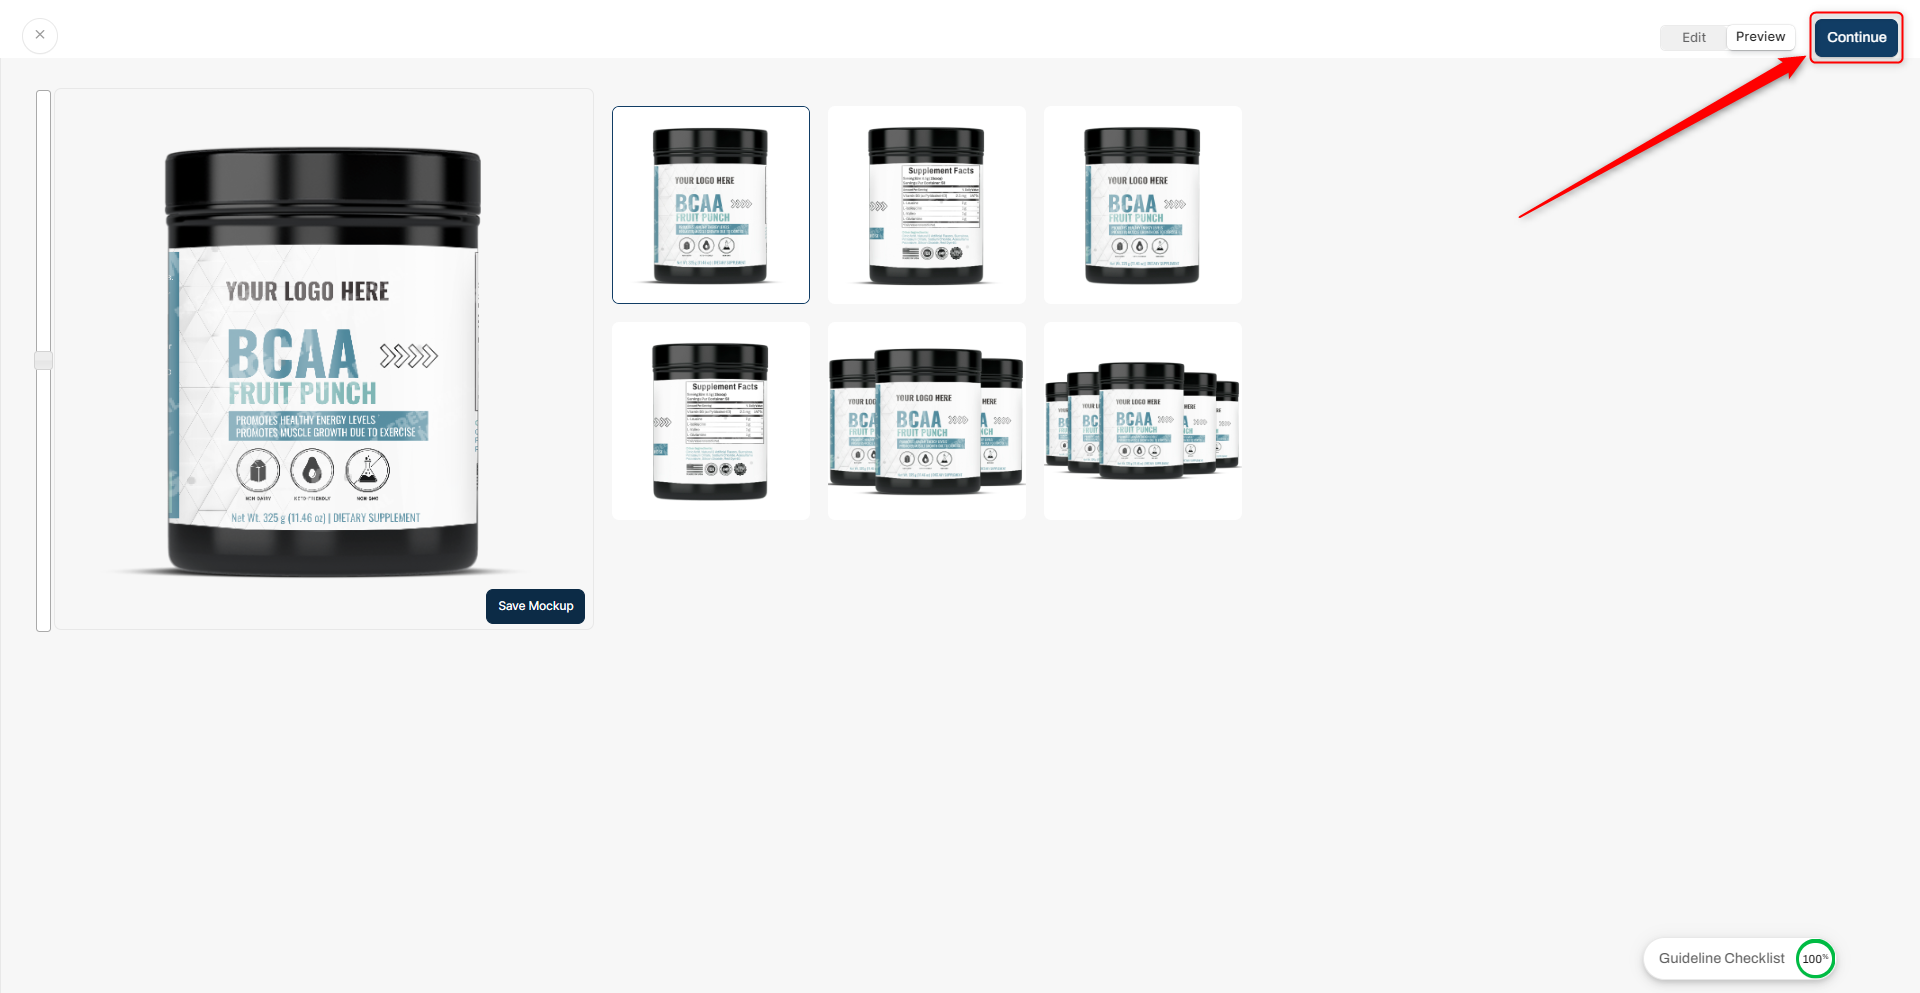
A sidebar appears with various fields, from product name to price. To move forward, make sure you input a retail price. Don’t worry, you can change this later.
As well, don't forget to choose your desired 3D mock-up images!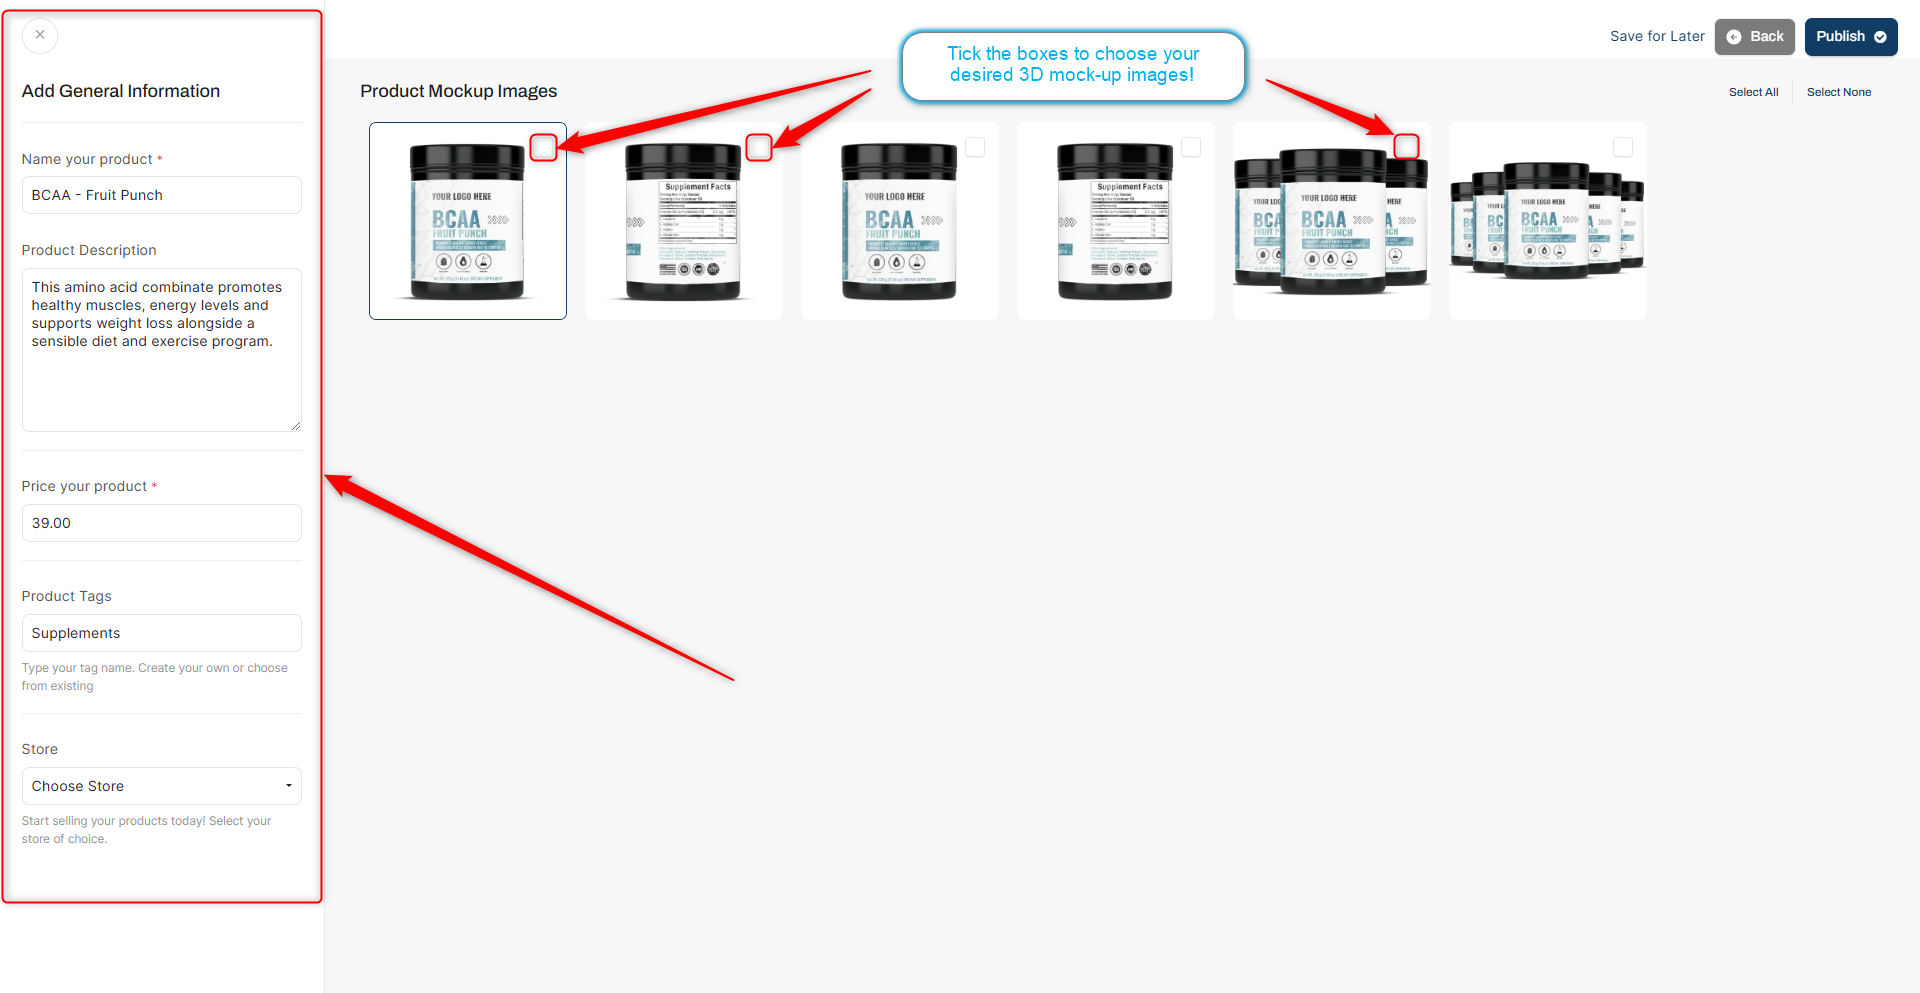
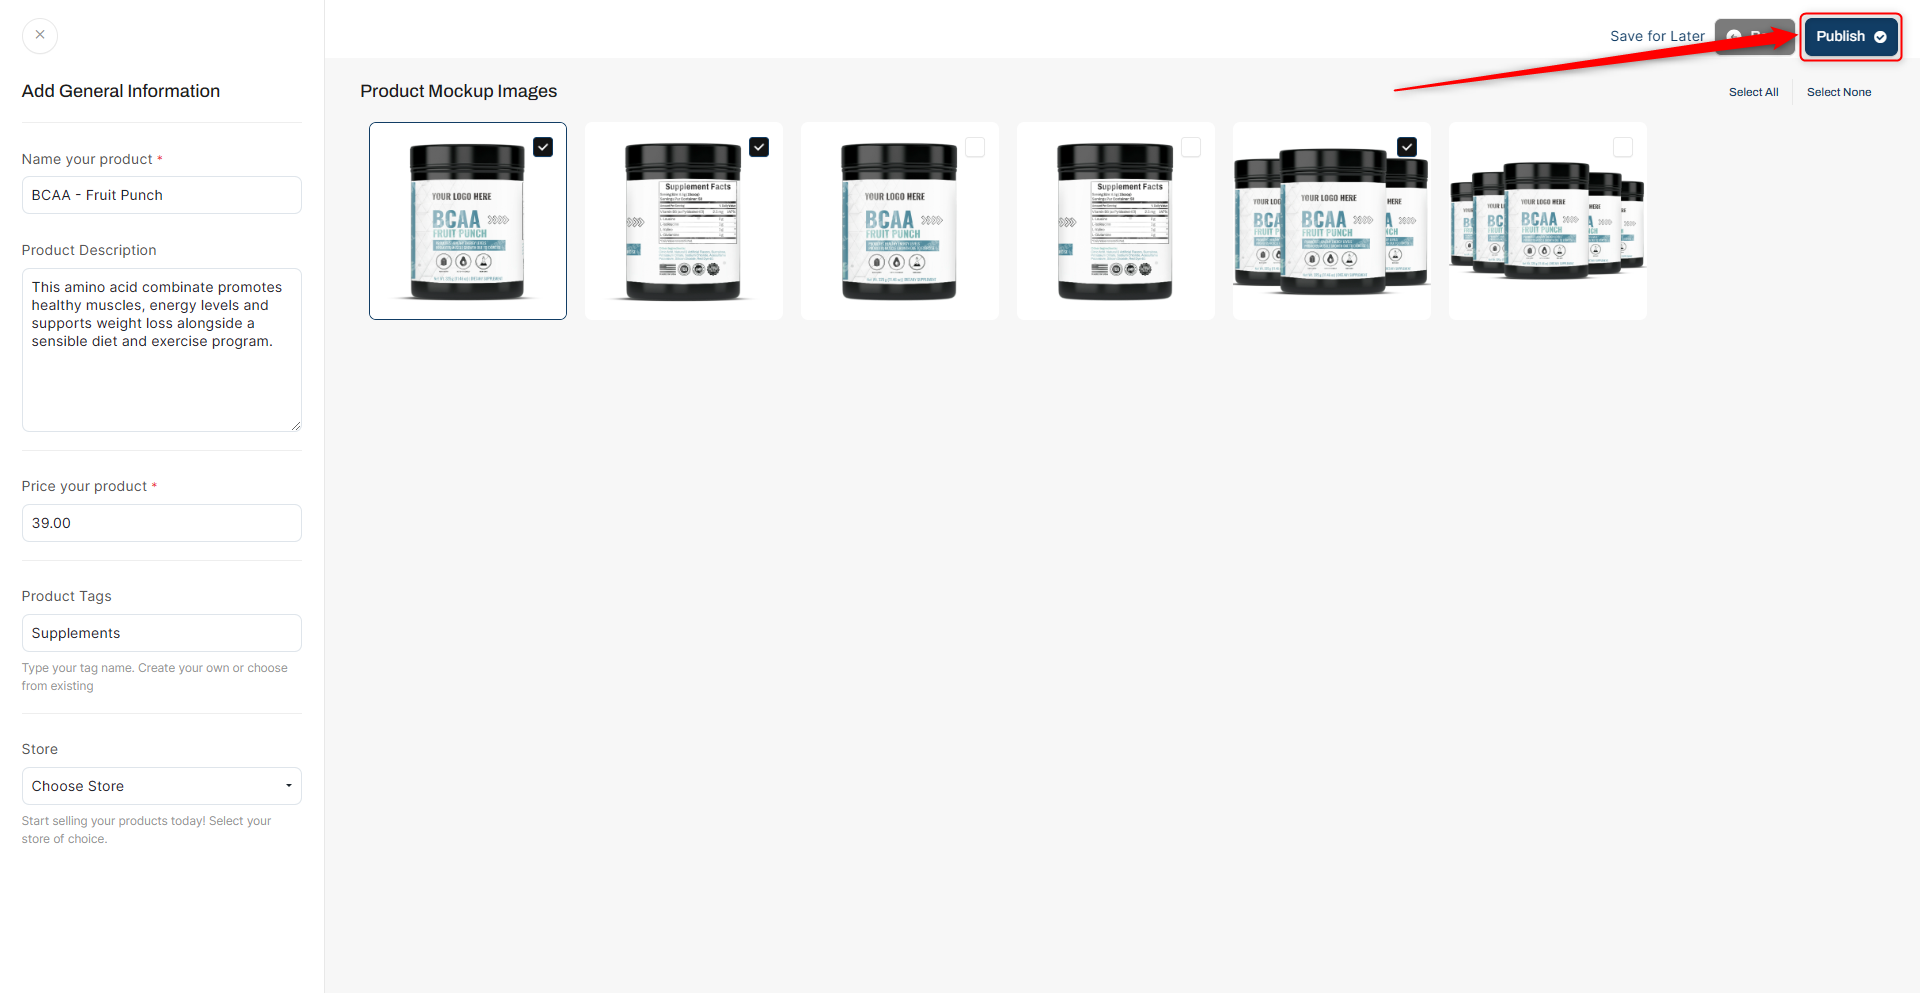
8. Now, hit 'Publish'. A confirmation prompt pops up.
Once you're sure, click 'Submit for Approval'. This sends your design to our dedicated quality assurance team. And hit 'Confirm'.
To track your submission, head to the 'My Products' tab to see its current status.
The progression is transparent: from 'Draft' to 'In Review', and with everything in place, to 'Approved'.
If there's feedback or a rejection, you’ll know precisely what needs tweaking.
You can review the feedback from the Quality Assurance Team by opening the product in review and navigating to the “Labels” tab inside.
You can also respond and upload any necessary supporting documents as well.
Upon approval, integrate your product with your store. It's a simple click to send your now-beautifully labeled product to your online storefront.
Note: If you have any further questions or need assistance, please don't hesitate to reach out. You can contact our Member Success Team through the live chat open Monday to Friday 9 AM - 5 PM ET, and they will be delighted to assist you.