Create professional labels for your products using our Label Lab design feature! Before we dive deeper, Here's an important note:
- You can start creating their personalized label once items are purchased
Let's start designing your labels!
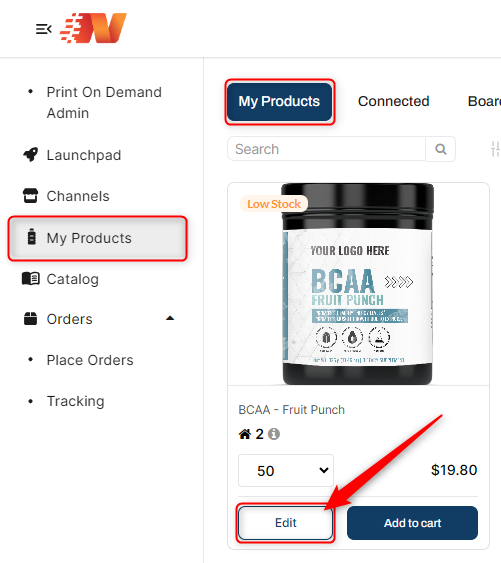
1: To design after purchase, go to My Product > My Product > Click "edit" button to specific product to design
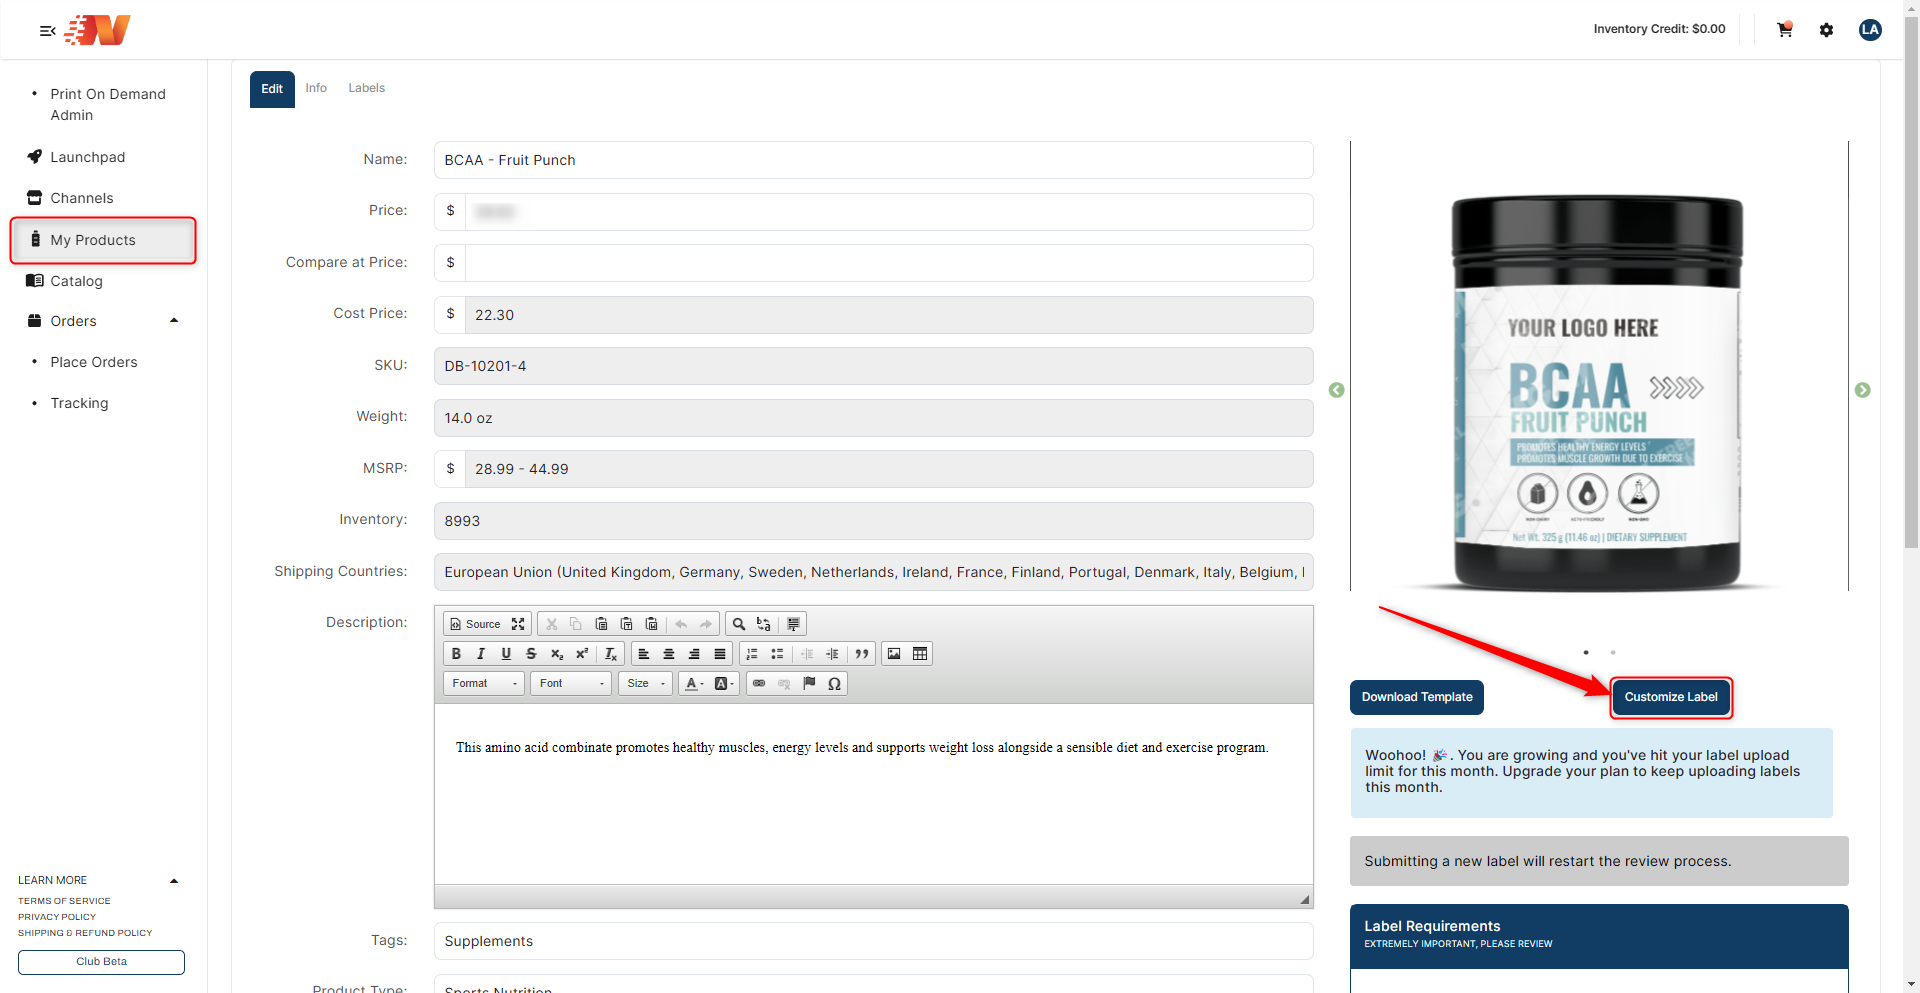
2: You will be routed to User Supplements Page and you can click "Customize Label" to start editing your label
3: Once Label Lab is open, you will see the Next Day Nutra Branded Label Template or choose in any of the available templates on the left side Panel "Templates". You can then start with designing your label template that will define your brand (Please refer to the Label Lab Design Tools for reference on what other elements you can use in designing your labels).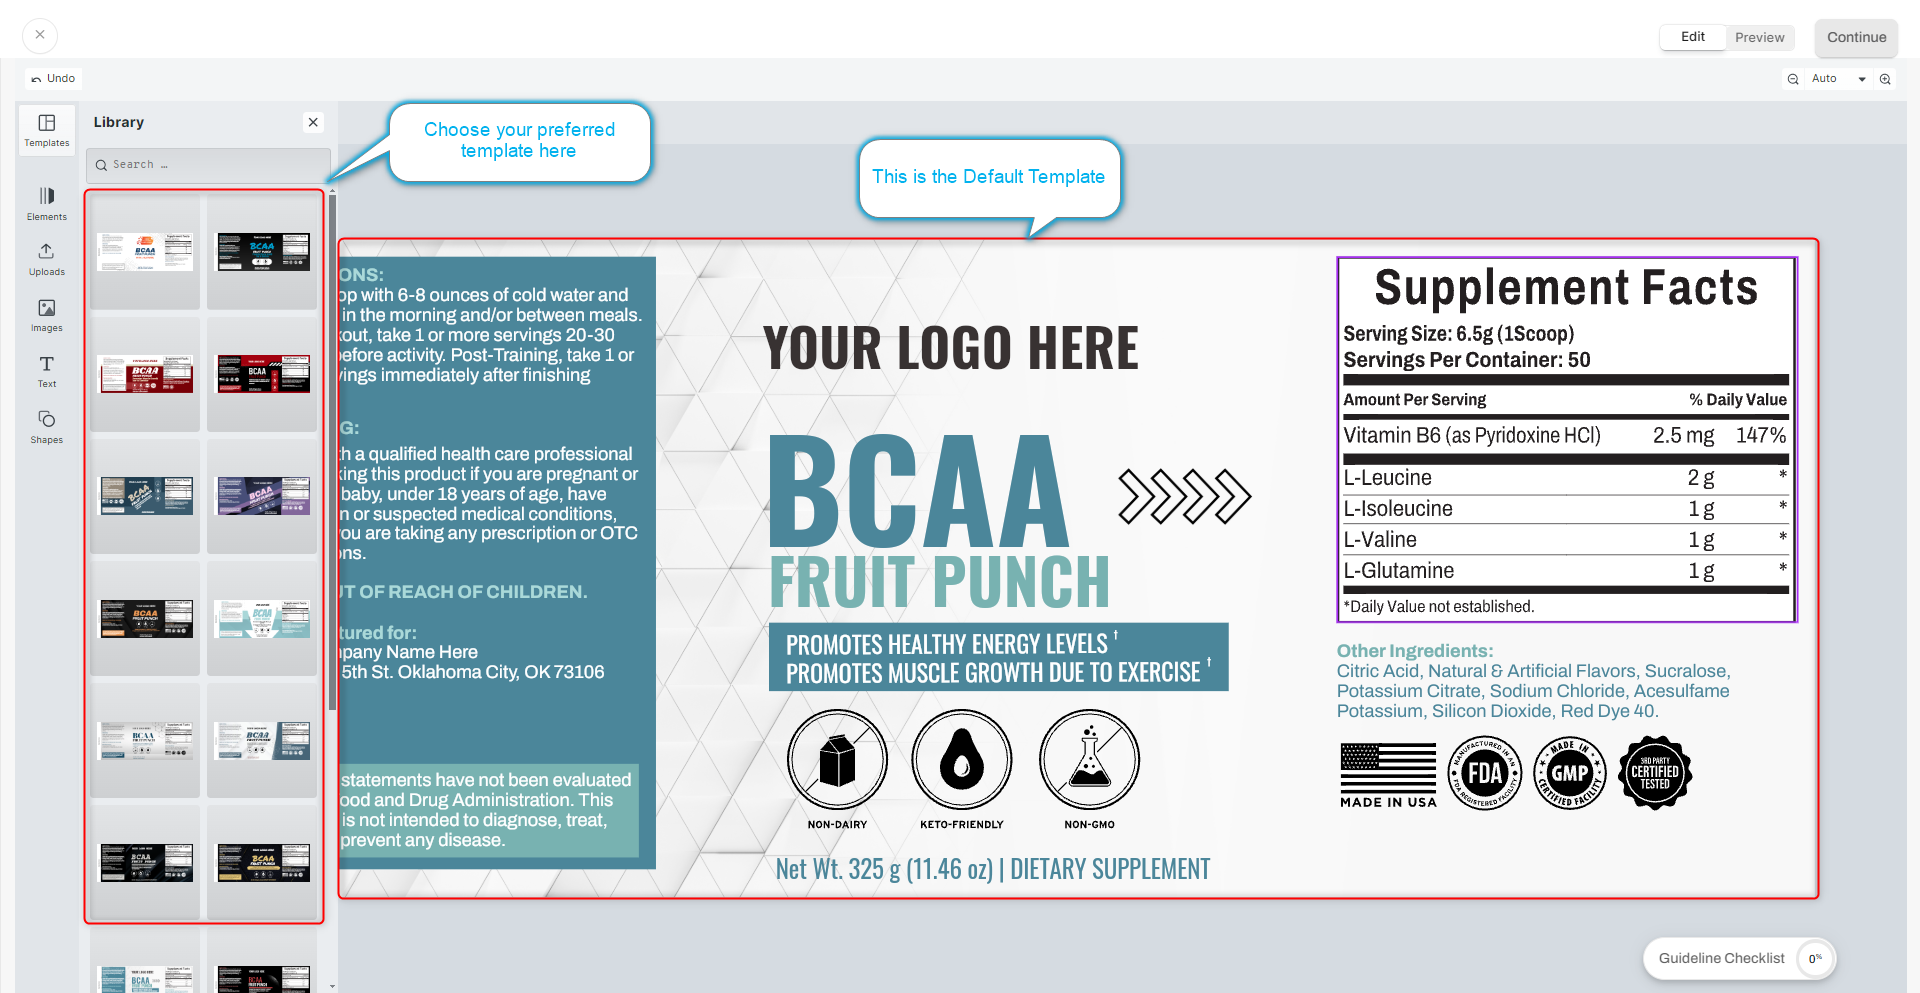
4: Once done with your design, you'll land on a review page. Adjust your label to fit the product preview just right and remember to hit 'Save Mock-up'.
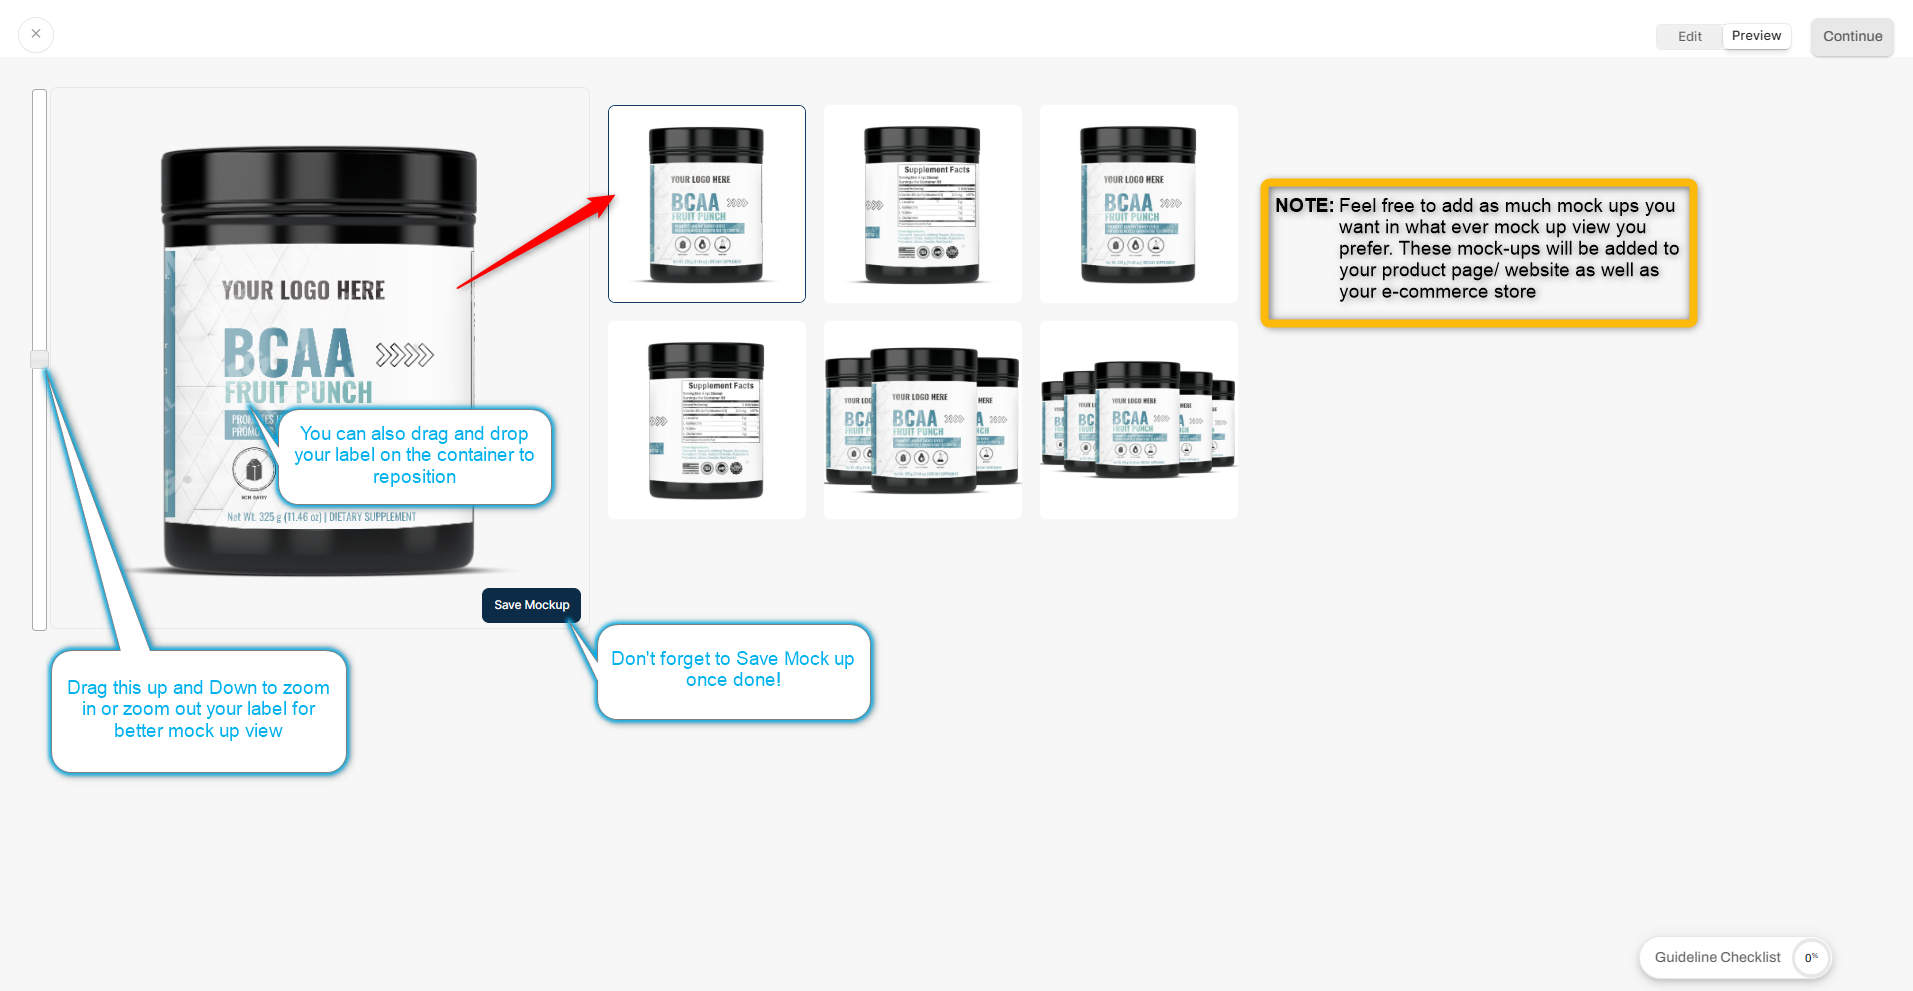
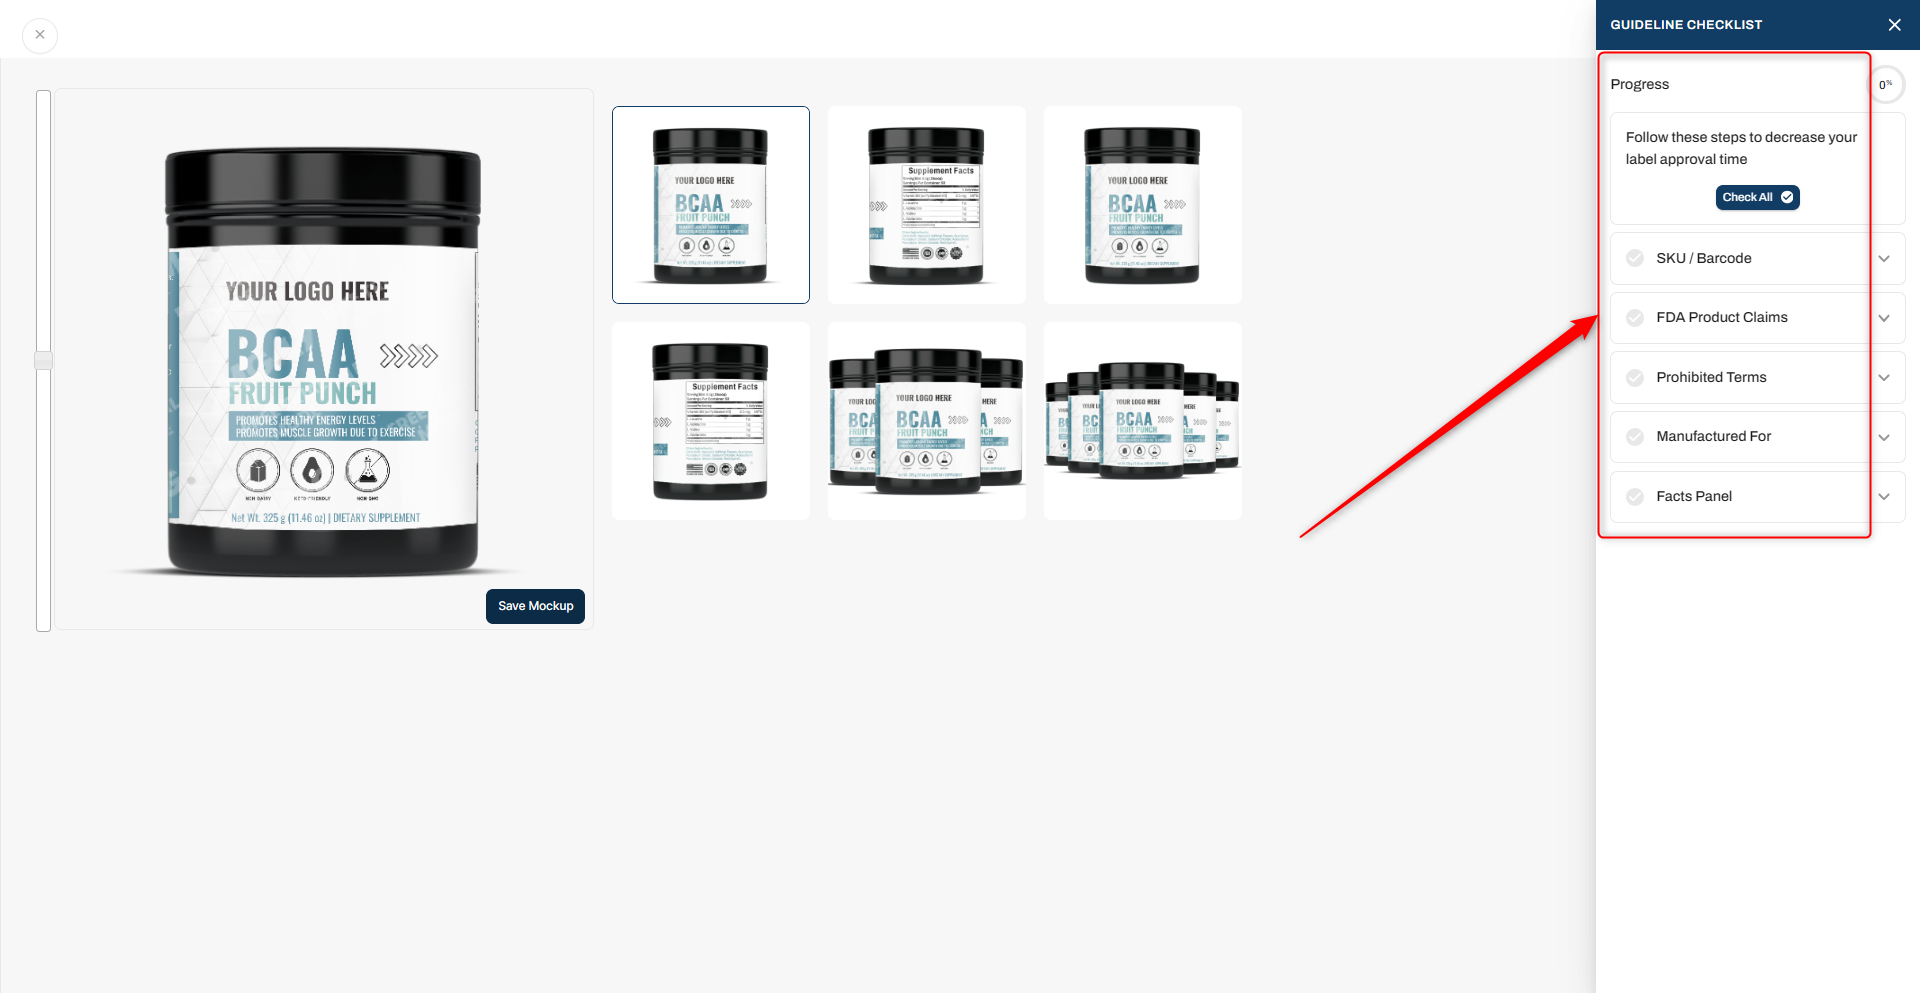
5: Your next focus? The guideline checklist is on the bottom right. Each item on this list ensures your label is primed for approval. As you confirm completion for each item, your progress will update. Reach 100%, and you're all set to move forward.
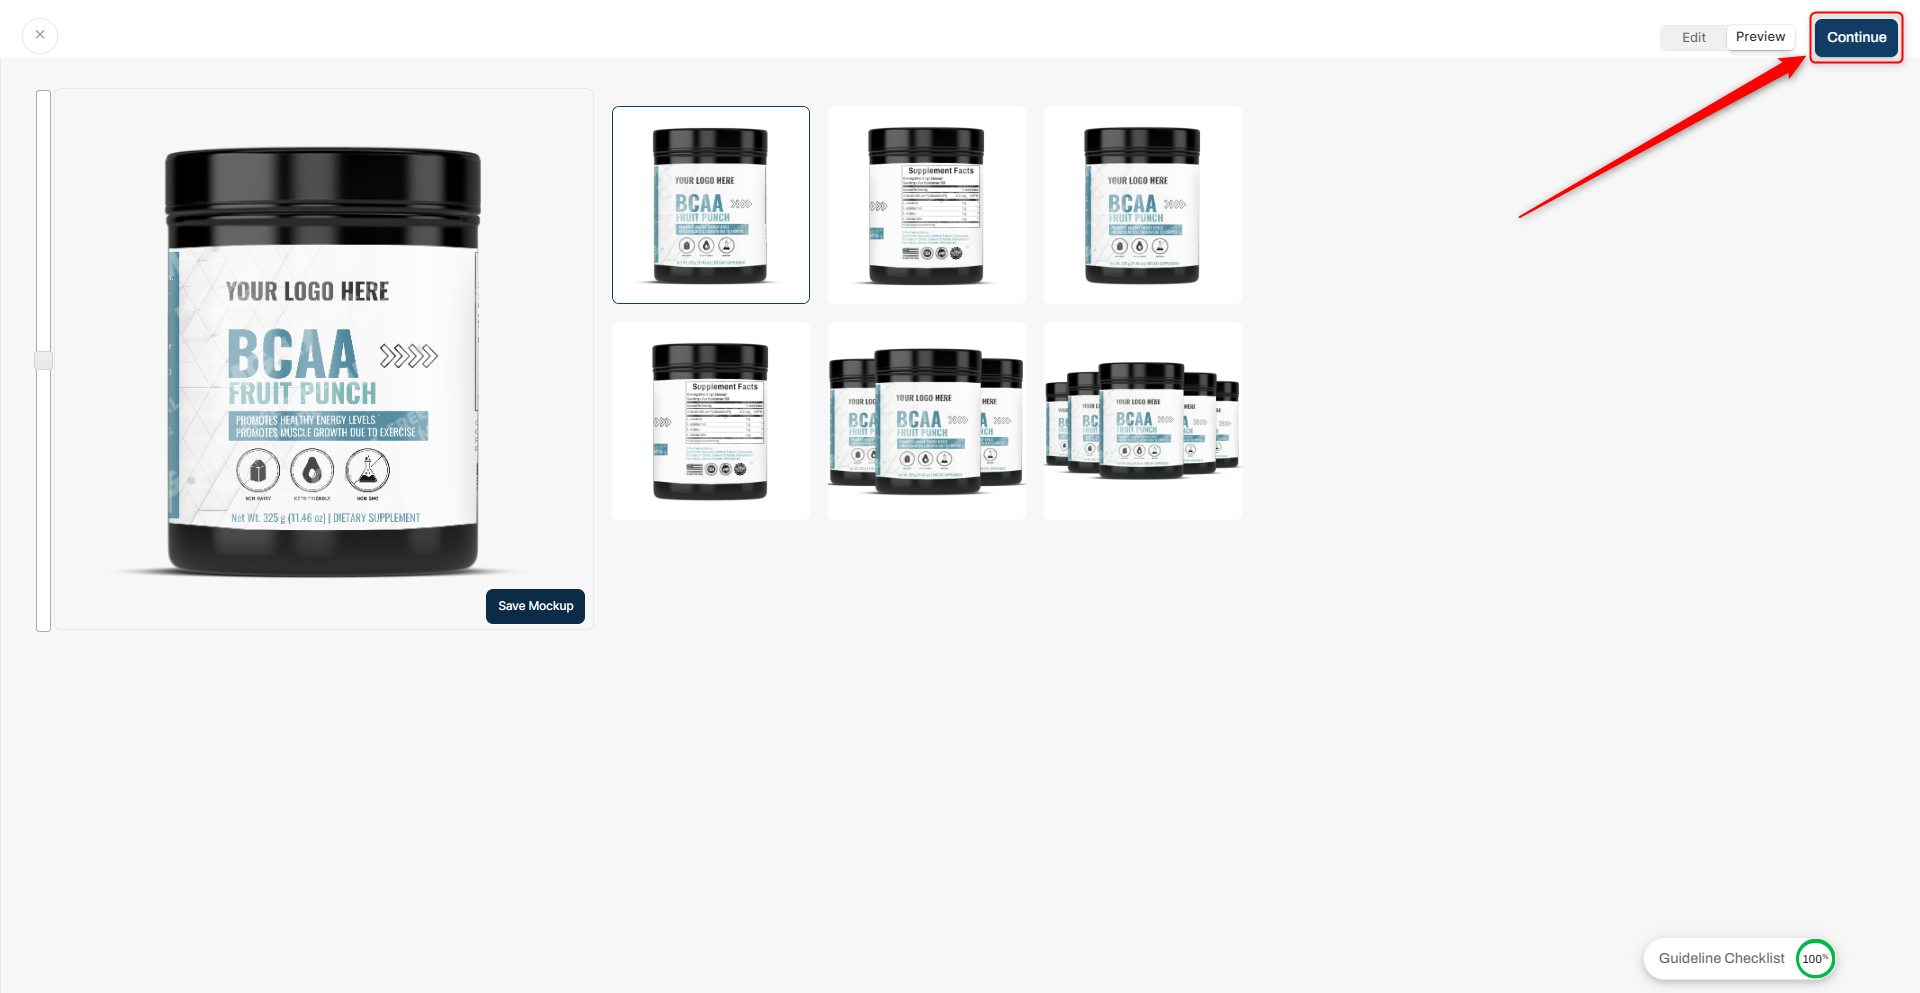
 6: “Click 'Continue'.
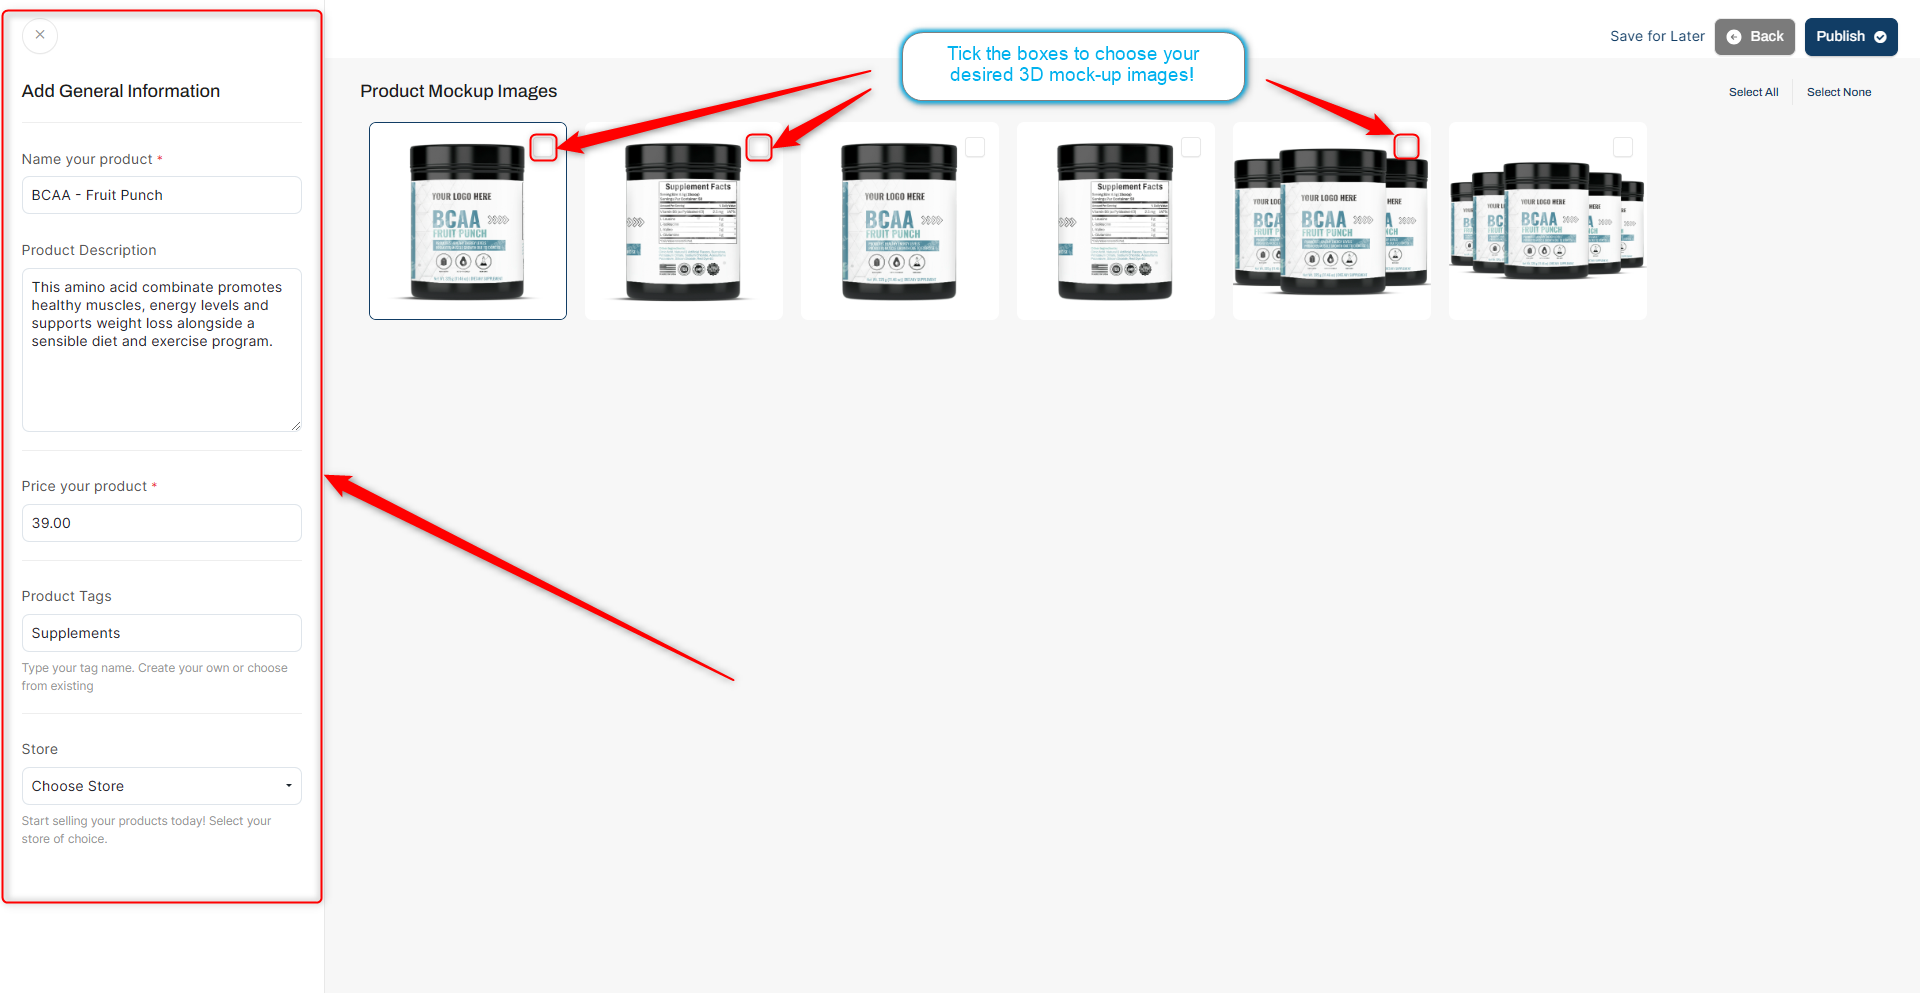
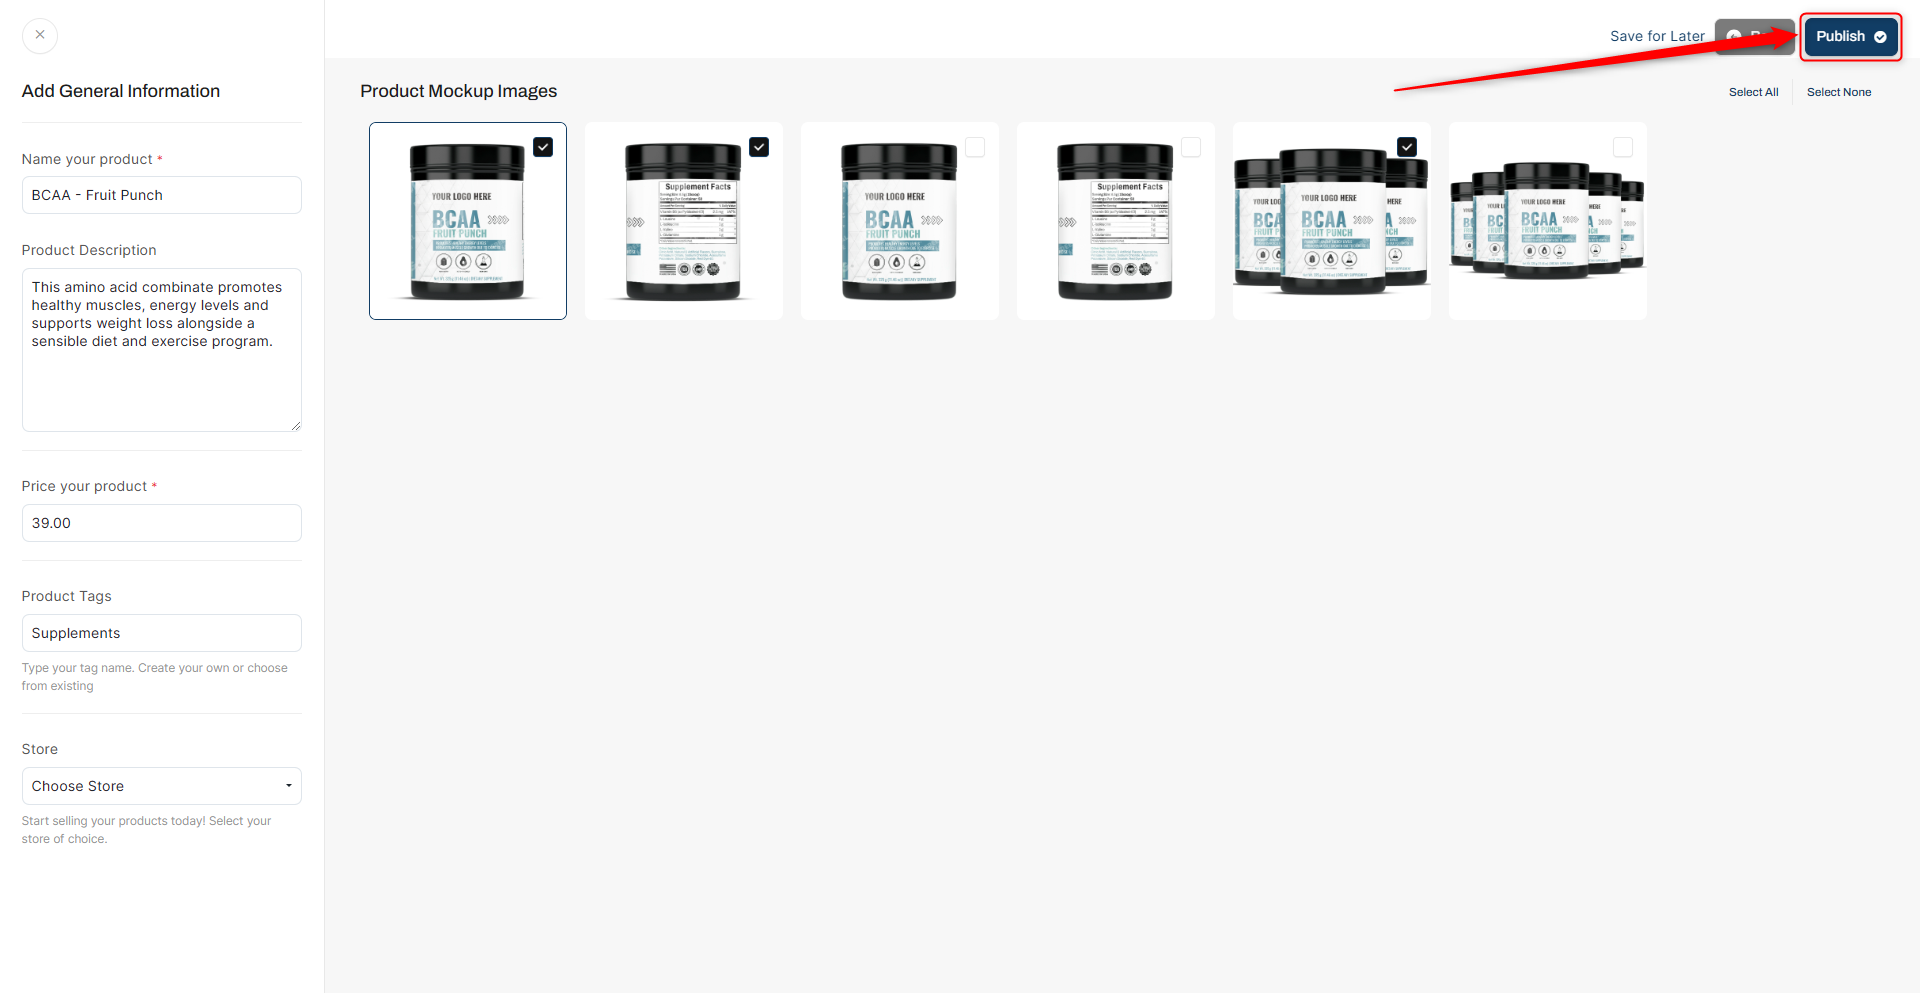
A sidebar appears with various fields, from product name to price. To move forward, make sure you input a retail price. Don’t worry, you can change this later. As well, don't forget to choose your desired 3D mock-up images!
7: Now, hit 'Publish'. A confirmation prompt pops up. Once you're sure, click 'Submit for Approval'. This sends your design to our dedicated quality assurance team. And hit 'Confirm'.
Label Lab Design Tools
Templates
How to design your label with pre-made templates or customize editable areas such as text, logos, and graphics.
Elements
Taking advantage of the elements panel for a library of graphics, text, and shapes to enhance your label design.
Uploads
Where to upload individual brand assets, graphics, your logo or anything you may need to create a label with your brand!
Images
Upload images designated areas, ensuring they integrate well with your label.
How to ensure proper placement within the design.
Text
Choosing fonts wisely and customizing text elements for readability and alignment.
Shapes
Integrate shapes to enhance your label's visual appeal. Adjust opacity and transparency to ensure the shapes complement the overall design.
Zoom
Use the zoom feature to inspect and refine small design details.
Ensure precise placement of elements by zooming in and out during the editing process.
The Guideline Checklist for Label Approvals
SKU / Barcode:
Confirm that no additional elements have been added to the SKU or barcode area.
FDA Product Claims:
Ensure that text in the FDA product claims area has not been edited.
Verify that symbols used in this area are consistent with the key benefit statement.
Prohibited Terms:
Confirm that prohibited terms specified by the FDA have not been used in key benefits.
Manufactured For:
Add the company name and address to the "Manufactured For" area.
Facts Panel:
Confirm that the information in the facts panel has not been altered.
To track your submission, head to the 'My Products' tab to see its current status.
The progression is transparent: from 'Draft' to 'In Review', and with everything in place, to 'Approved'.
If there's feedback or a rejection, you’ll know precisely what needs tweaking.
You can review the feedback from the Quality Assurance Team by opening the product in review and navigating to the “Labels” tab inside.
You can also respond and upload any necessary supporting documents as well.
Upon approval, integrate your product with your store. It's a simple click to send your now-beautifully labeled product to your online storefront.
Note: If you have any further questions or need assistance, please don't hesitate to reach out. You can contact our Member Success Team through the live chat open Monday to Friday 9 AM - 5 PM ET, and they will be delighted to assist you.


