

In this article, we'll cover the following:
Create a Product
Send Label for Approval
Upload the Label File and Customize Mockup
View Guidelines Checklist
Edit a Product
Create Multiple Versions of the Same Product (Layer Marketing)
Create a Product
To create a new product, go to the Products Catalog section of your account, and then click the supplement that you want to create.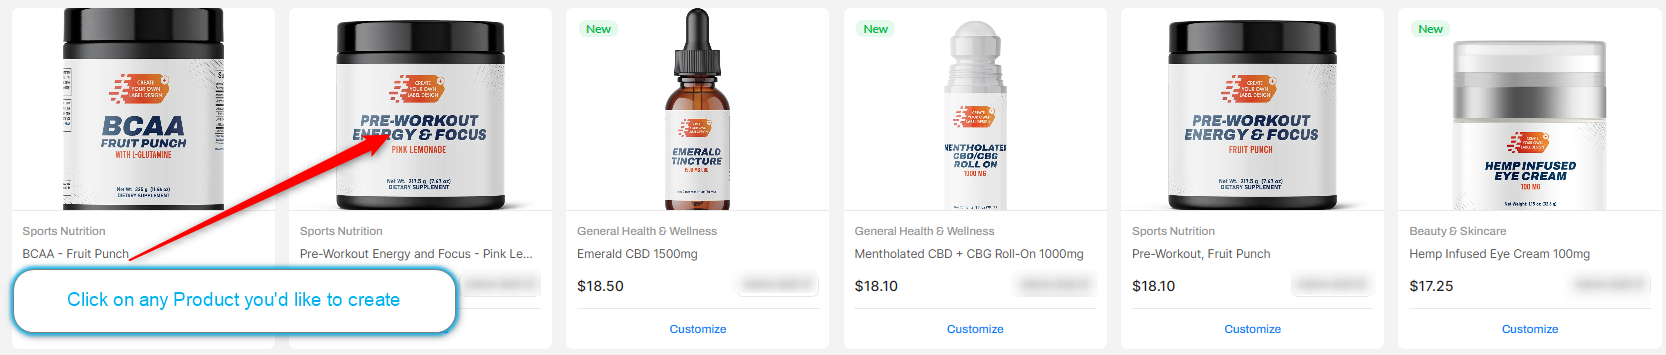

From the product edit page, you can view the Cost Price for the item, a default description, along with some other details of that product. You can also find the Certificate of Analysis by switching over to the Info tab.
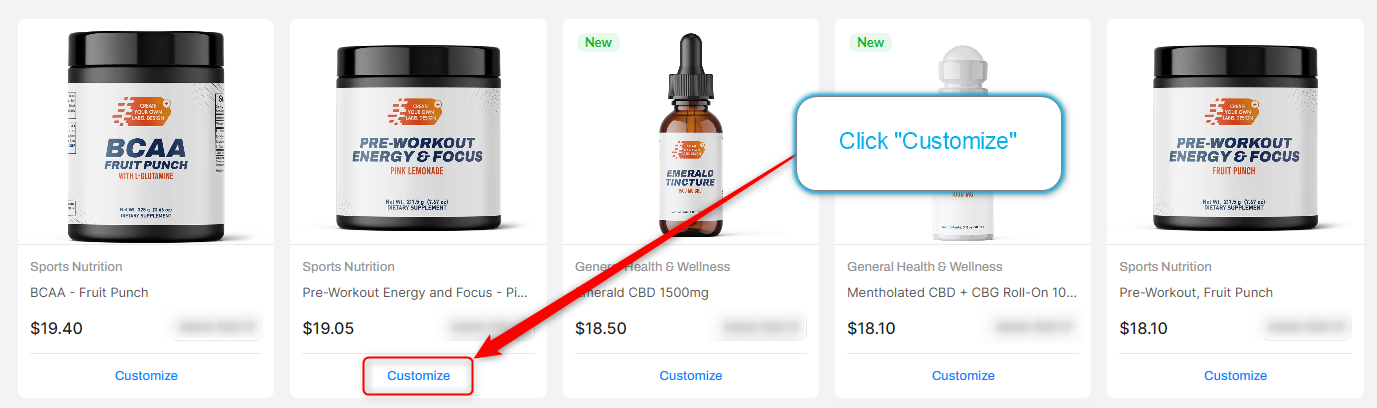
There are 2 ways to create a product Label. Using our Label Lab, or an external software. Here are 2 articles that walk you through both options!
Design Label using Label Lab - Utilize our WYSIWYG Label Editor tool, 'Label Lab,' your comprehensive solution for editing and customizing labels for your brand.
Design Label Outside of NDN (Template Method) - Are you an experienced designer or do you have someone who handles design for you? If you prefer to design your labels outside of our app for more customization, you might find this article helpful. Click Download Template to get the label template for that product, and open the file in any vector image editor (such as Adobe Illustrator or InkScape) to design your label. Make sure to follow the Supplement Label Guidelines closely to avoid your newly created Label from being rejected by the review team.
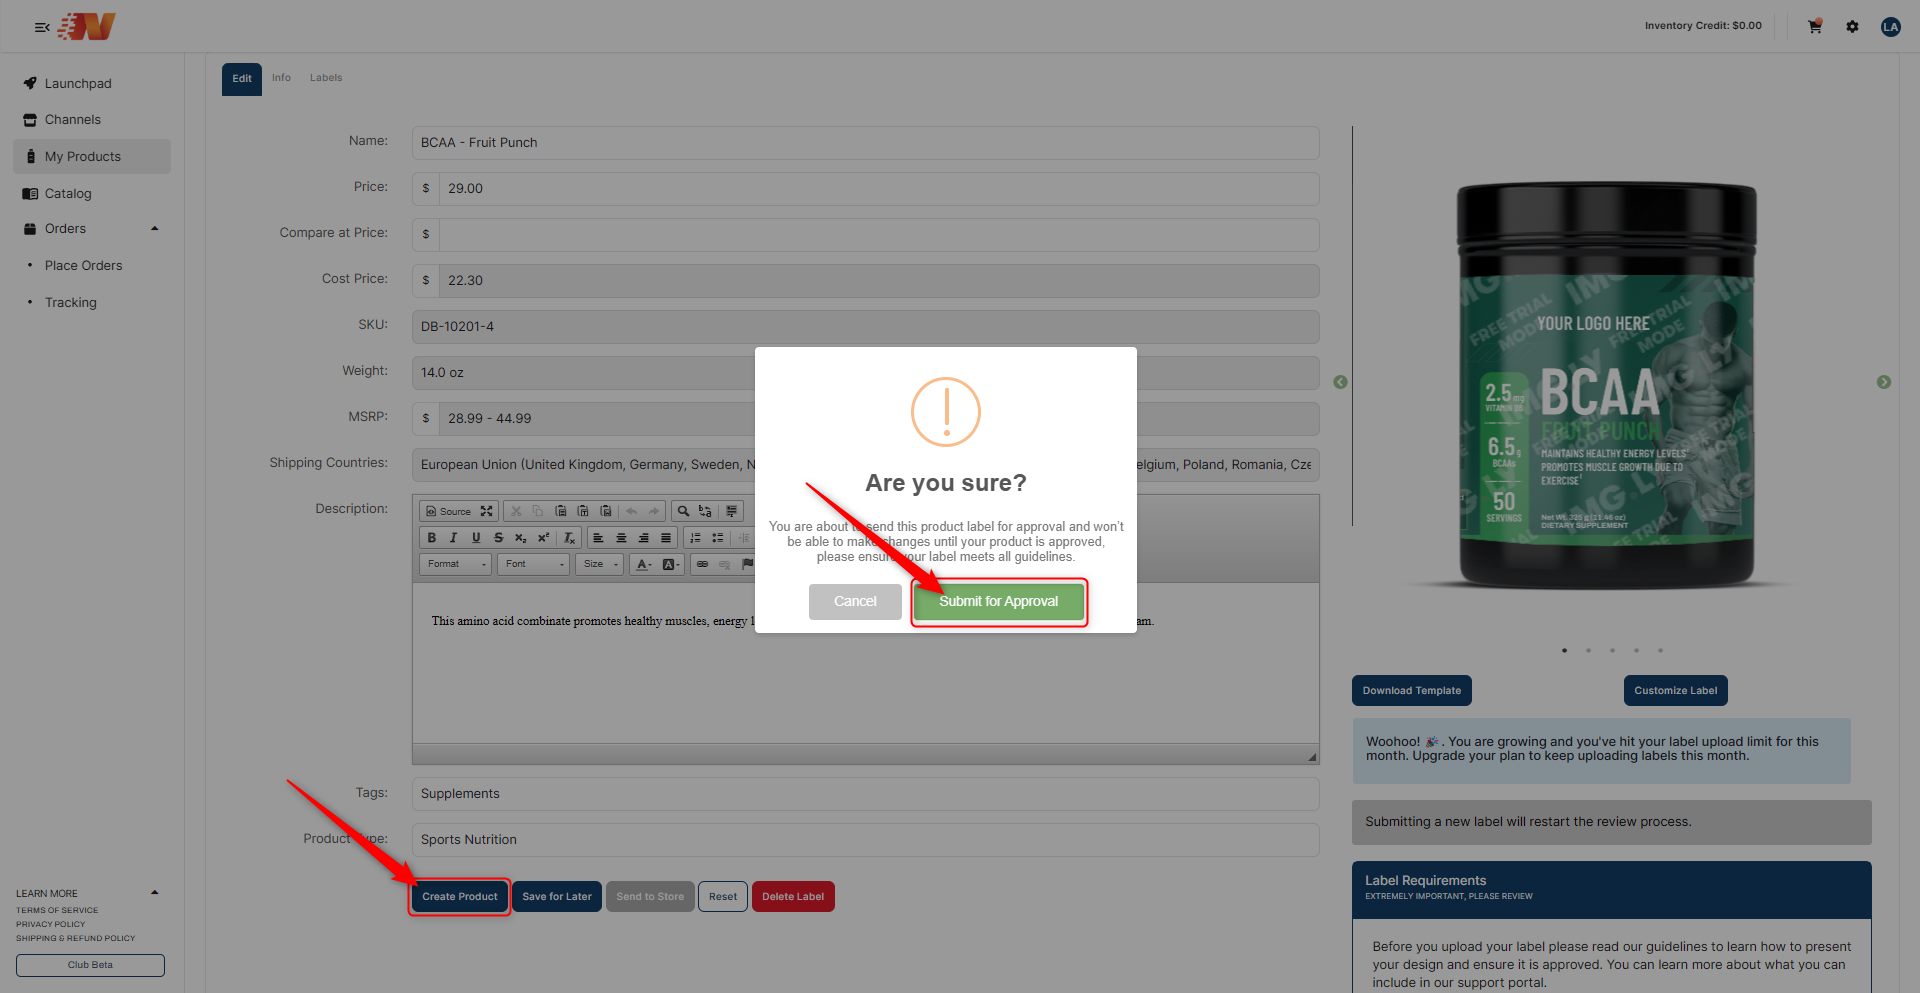
Send Label For Approval
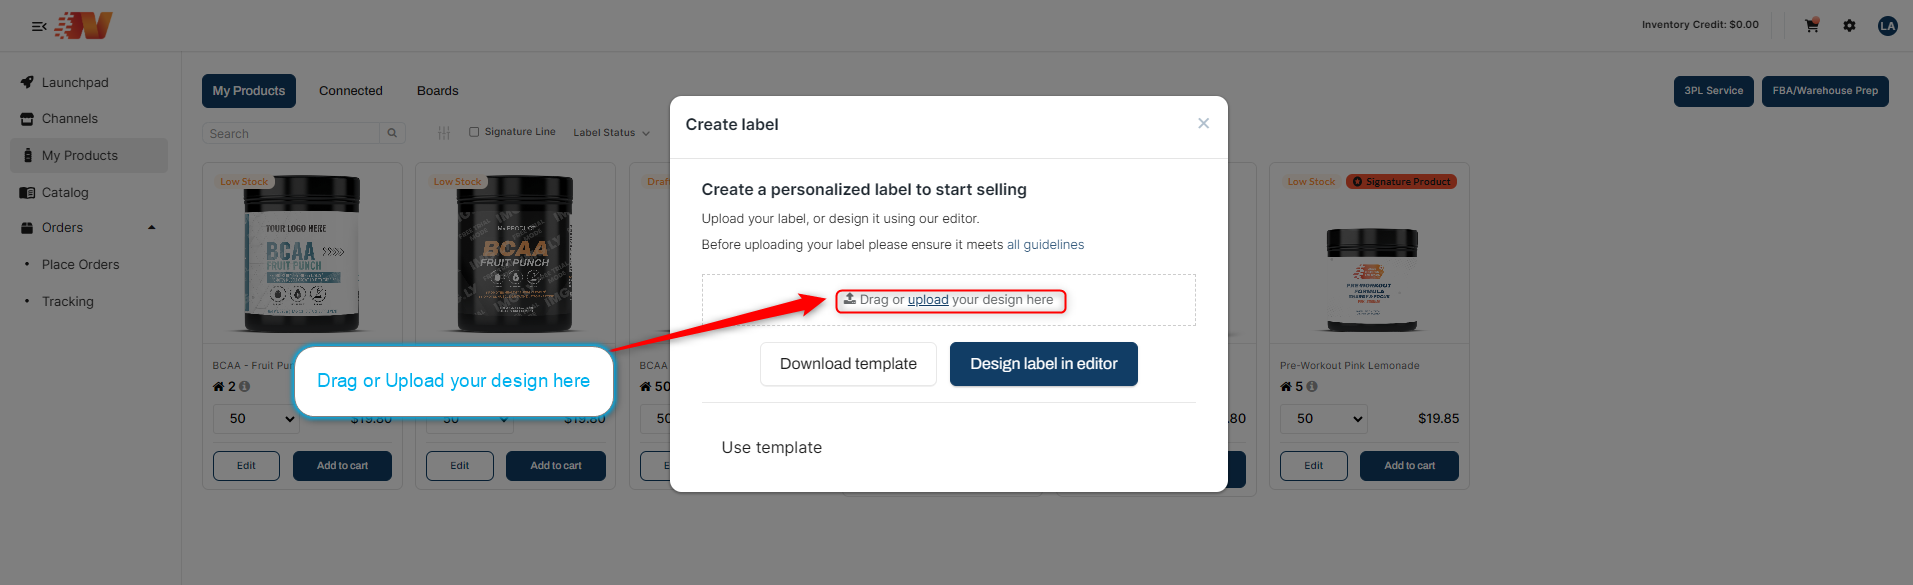
Upload the Label File and Customize Mockup
When you're ready to upload your custom-designed label into the supplement and submit it for review, click Customize > Upload File and select the label file that you want.
Once the label file is loaded, you can choose and make adjustments to the mockup images that you want to use. See to it that you click on "Save Mockup" to keep those changes.
You will be directed to the page where you will be able to zoom in and out (using the toggle slider on the left) and drag your label around until it's perfect. Don’t forget to click “Save Mockup” when you’re done placing the mockup.
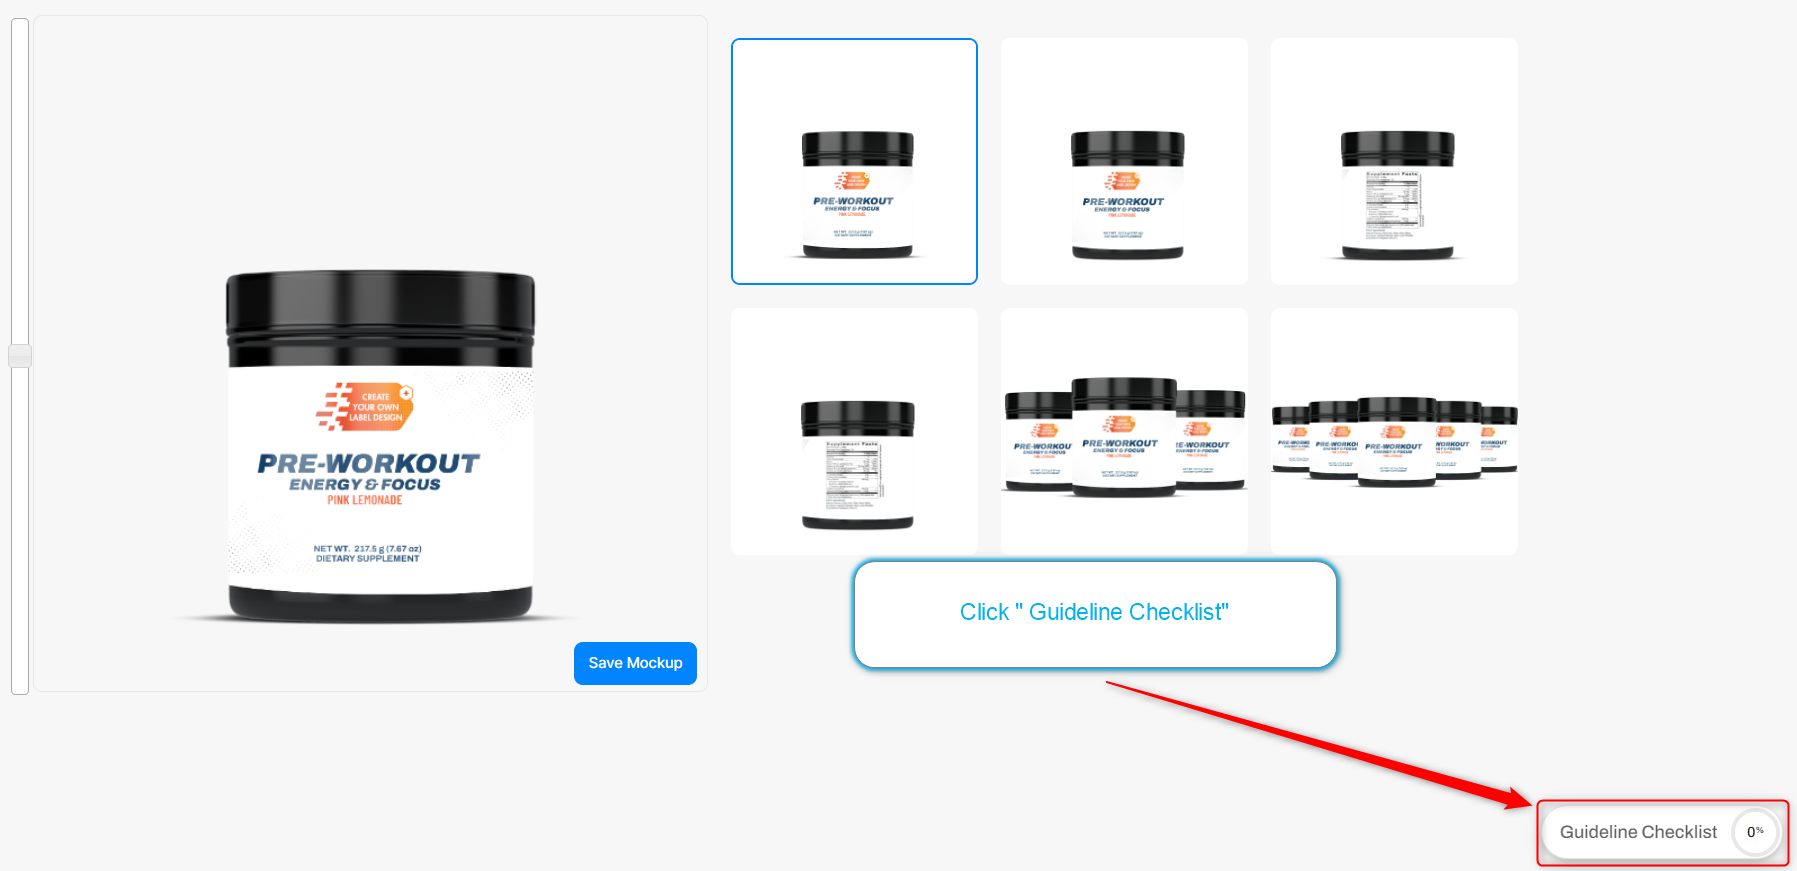
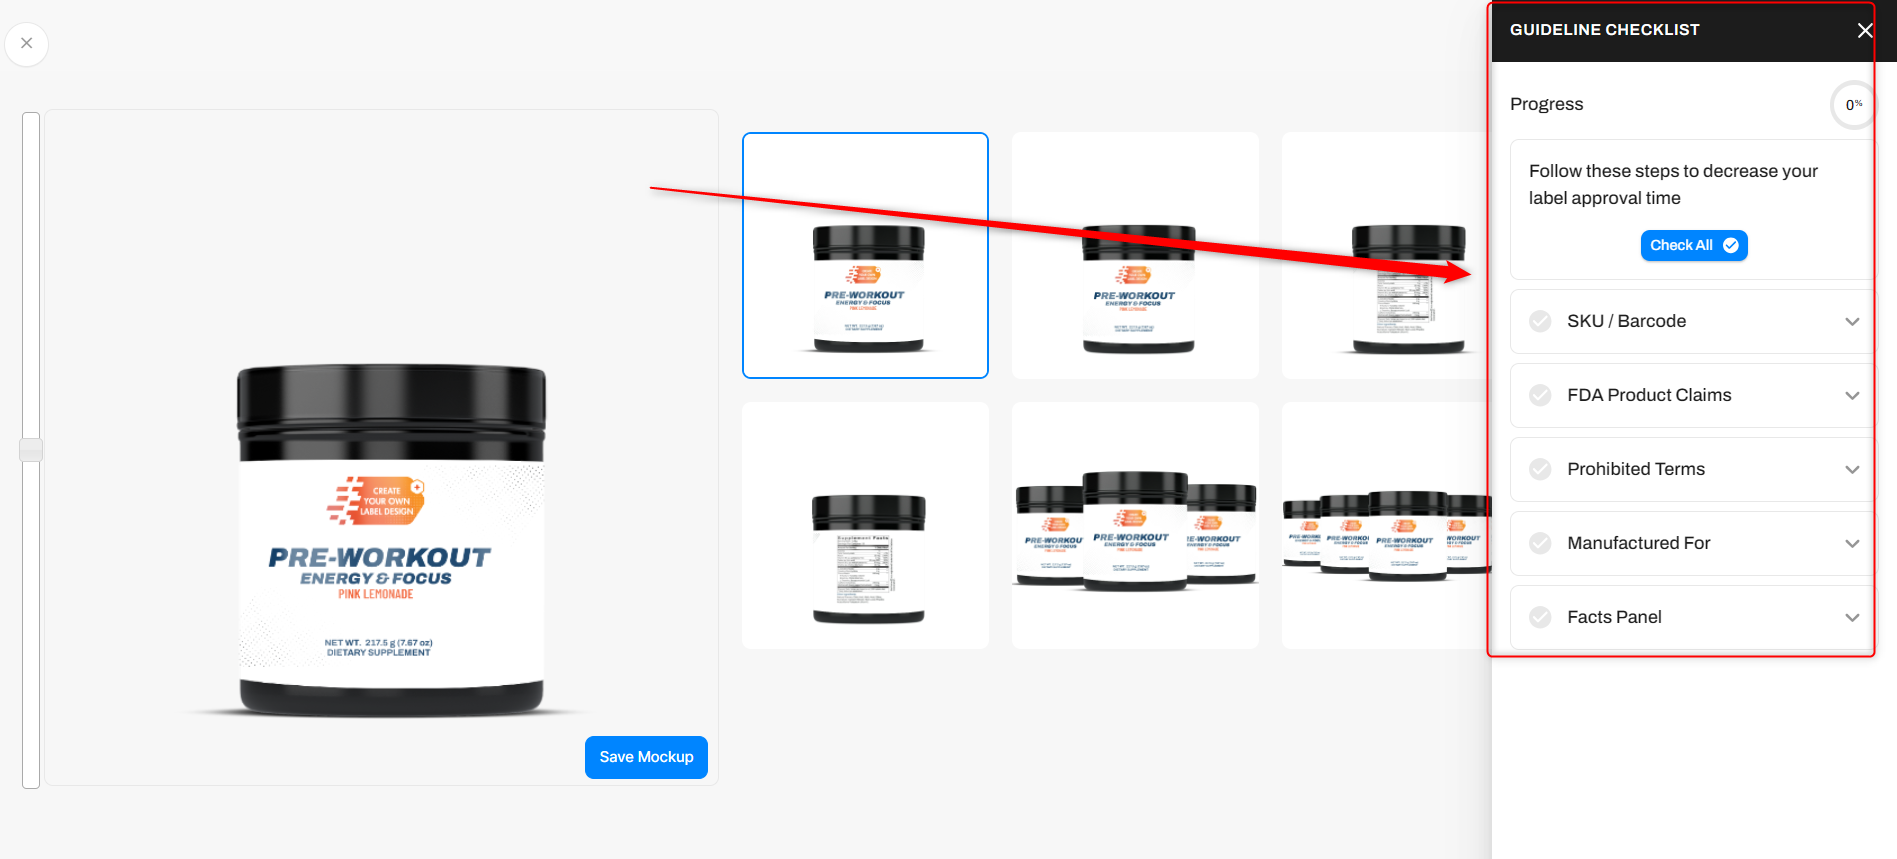
View the Guideline Checklist, read each guide, and don’t forget to hit the check box next to each item.
Note: You will not be able to continue if the Guideline Checklist is not 100% marked as complete.
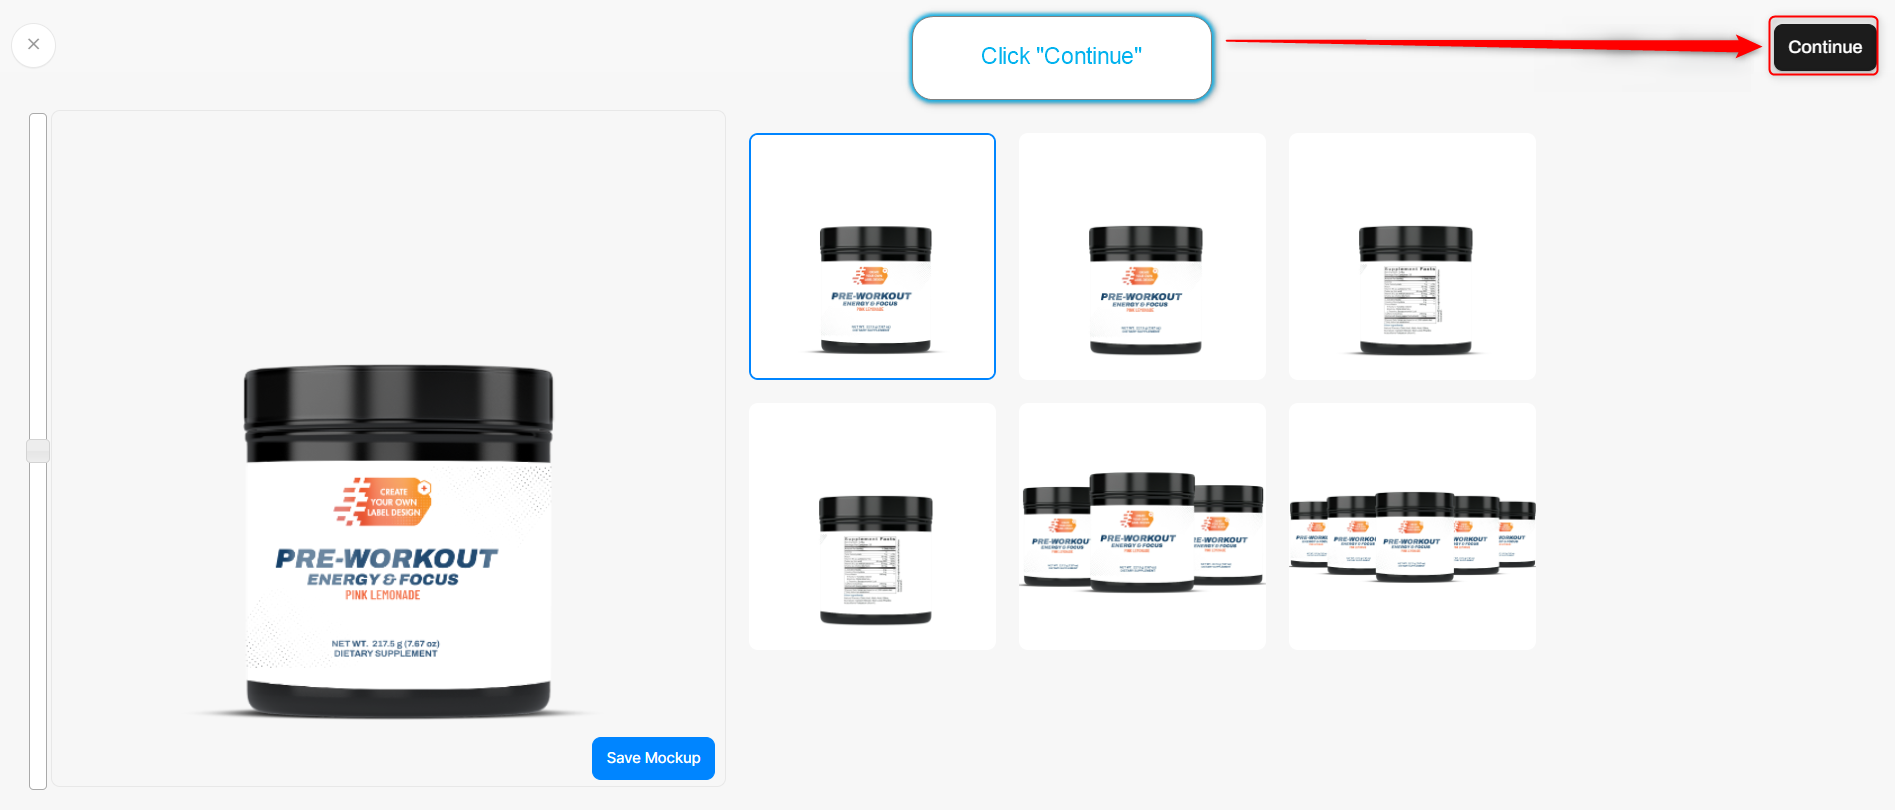
After uploading the label and completing the product edit Click “Continue”

Add General Information, including your selling price (the price the customer will pay in your online store).
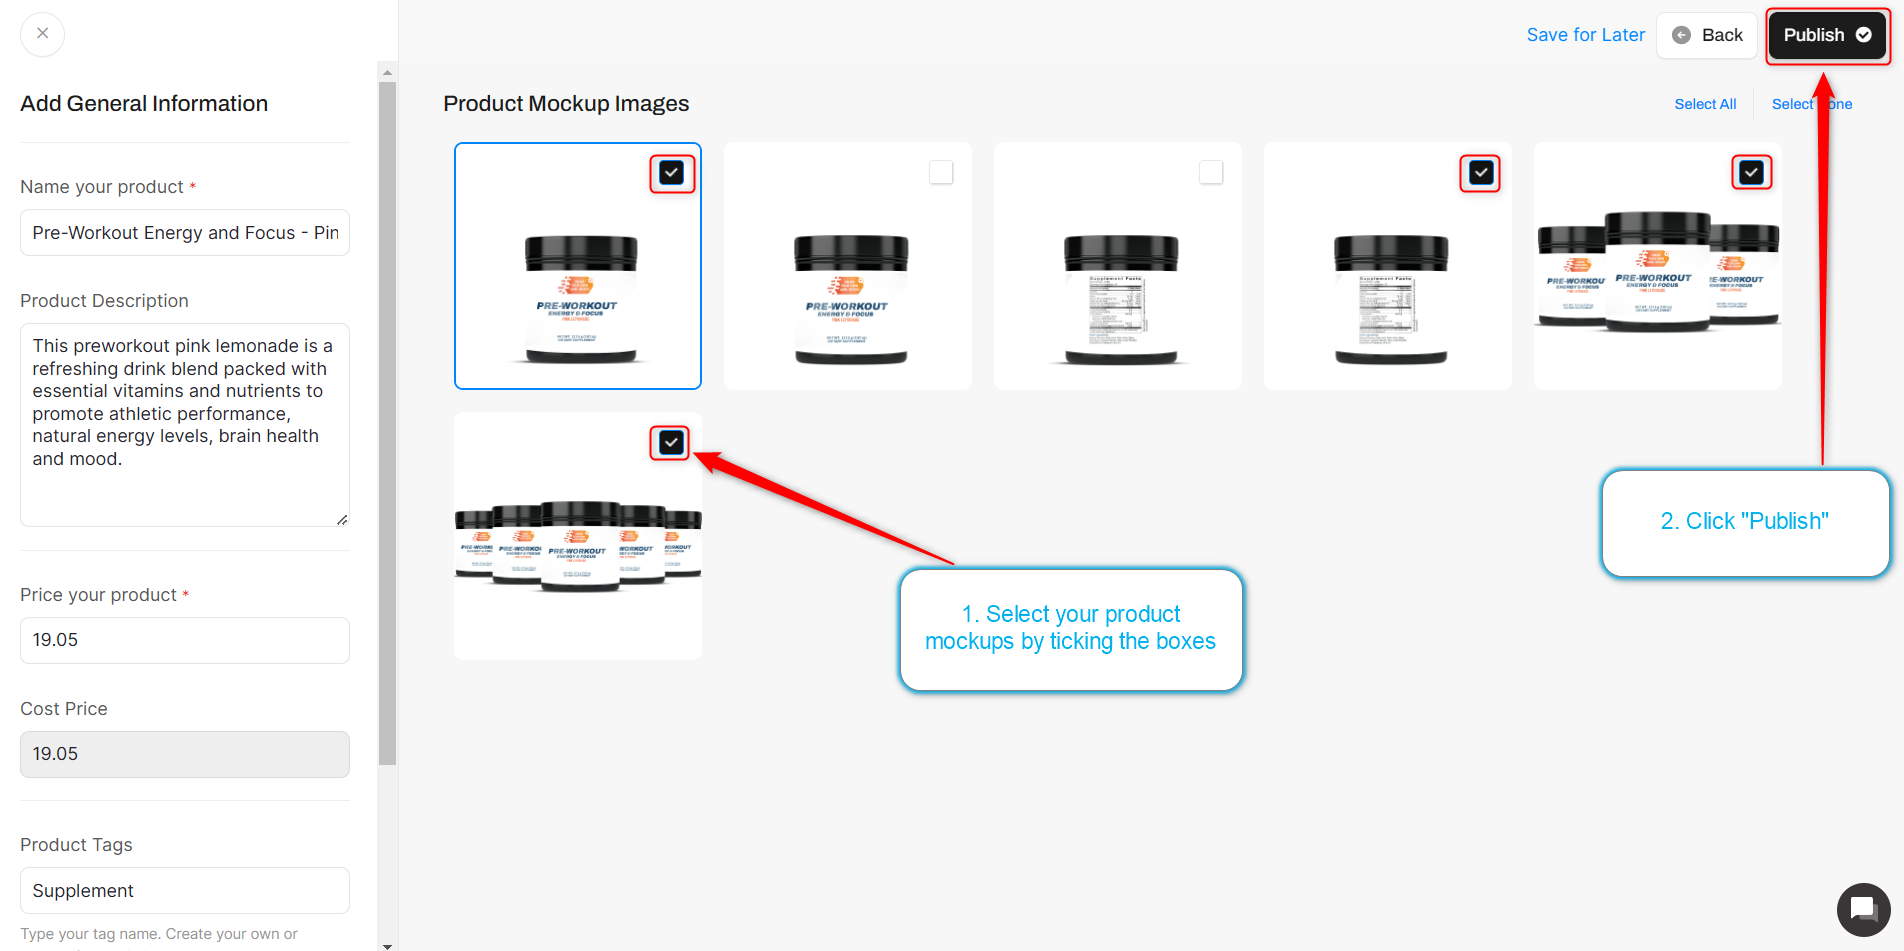
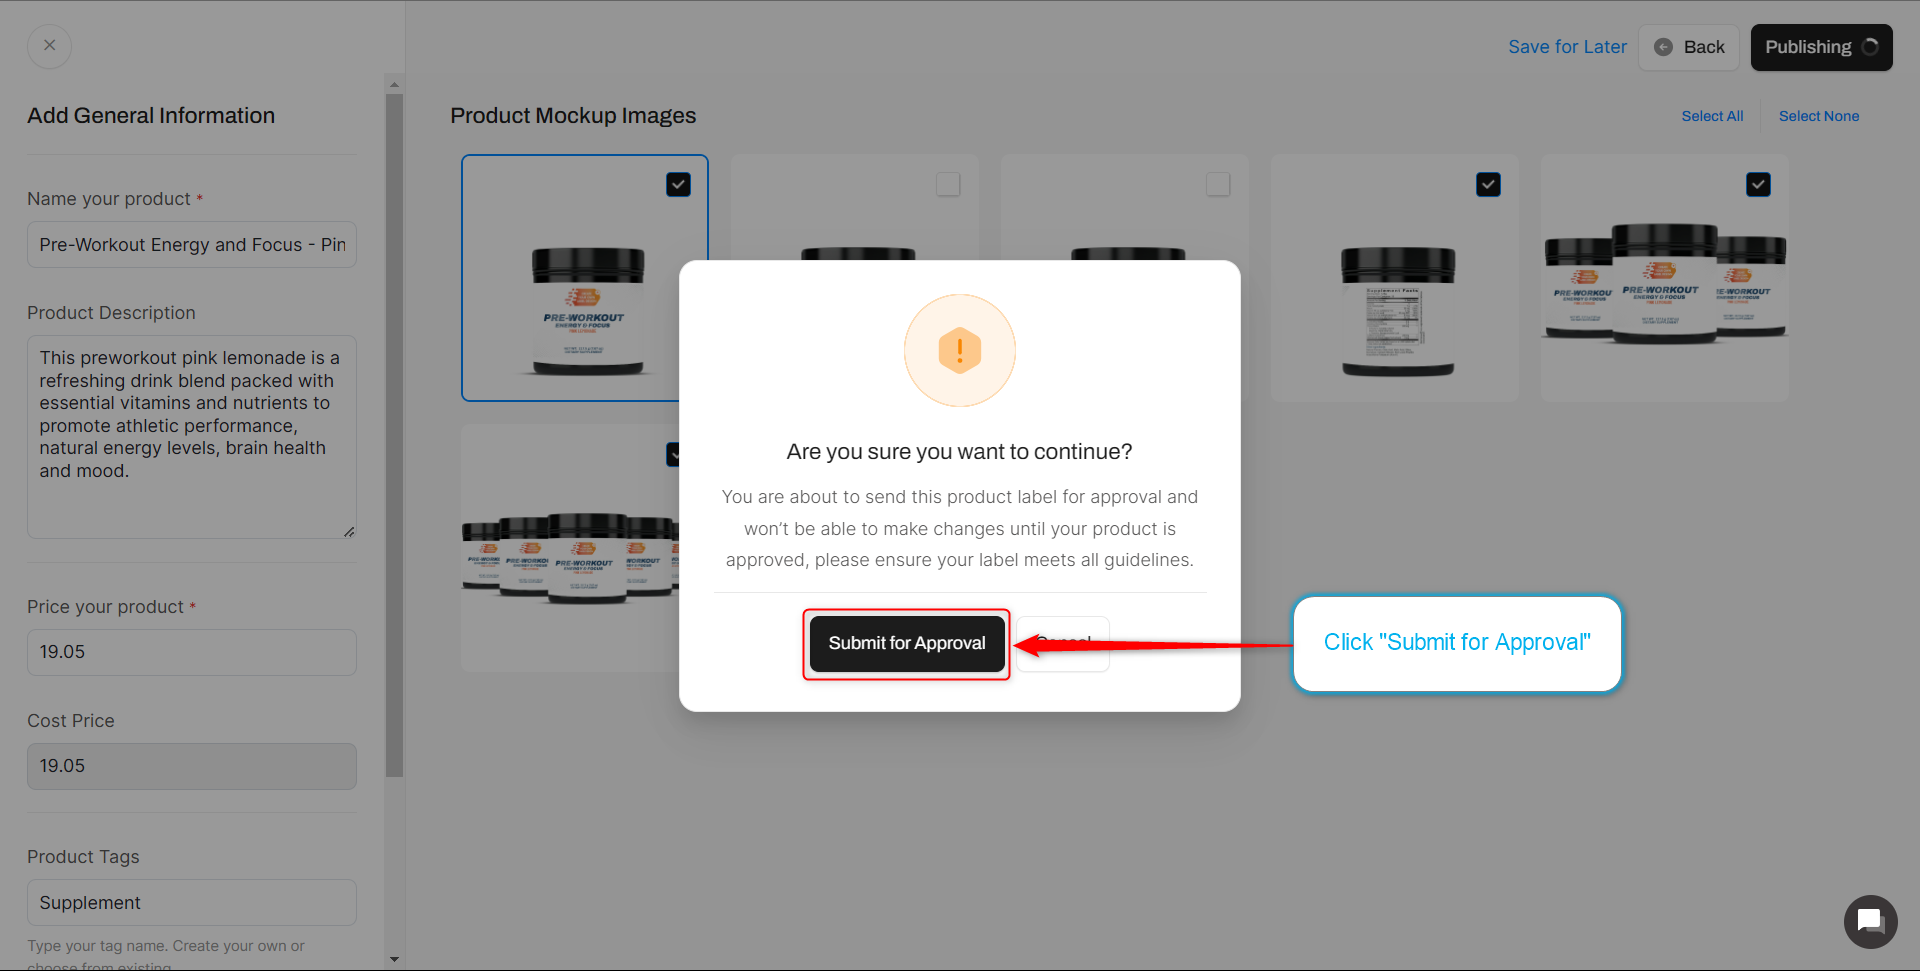
Select your Product Mockup Images by ticking the boxes you would like to send for approval and click “Publish”
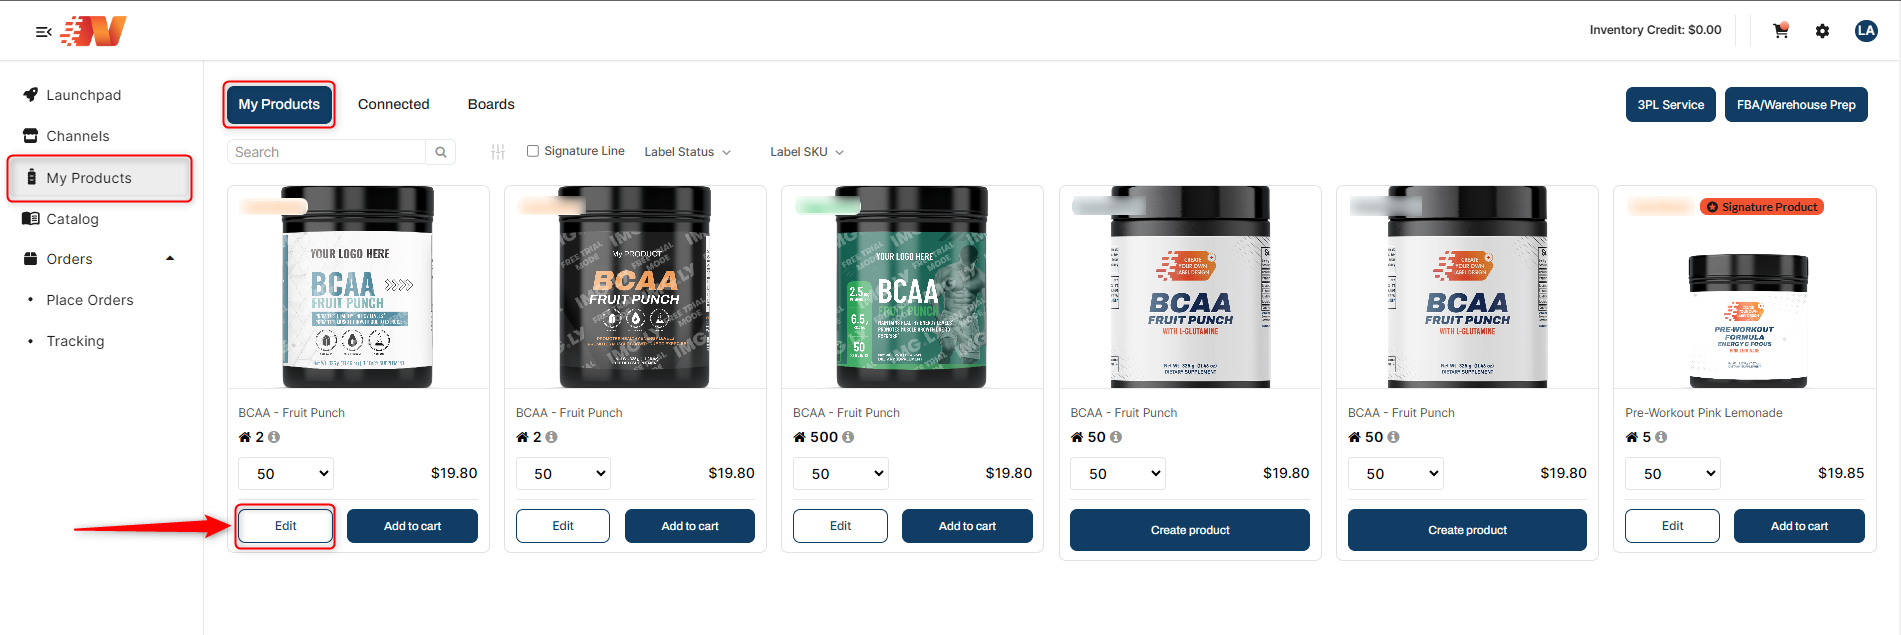
After uploading the label and completing the product edit, make sure to go back to My Products > My Products then click your product that is in draft

Edit a Product
If your label has been rejected and updates are required, you can upload a new label on an existing product by going to My Products and clicking Edit →.
Upload a new label file to replace the existing label by clicking "Customize Label". It will reopen Label Lab for you to continue editing the product and if no further update is needed, click continue then you can see Publish button where you can submit the revised label for review. Same steps applies if you want to edit your existing approved label.
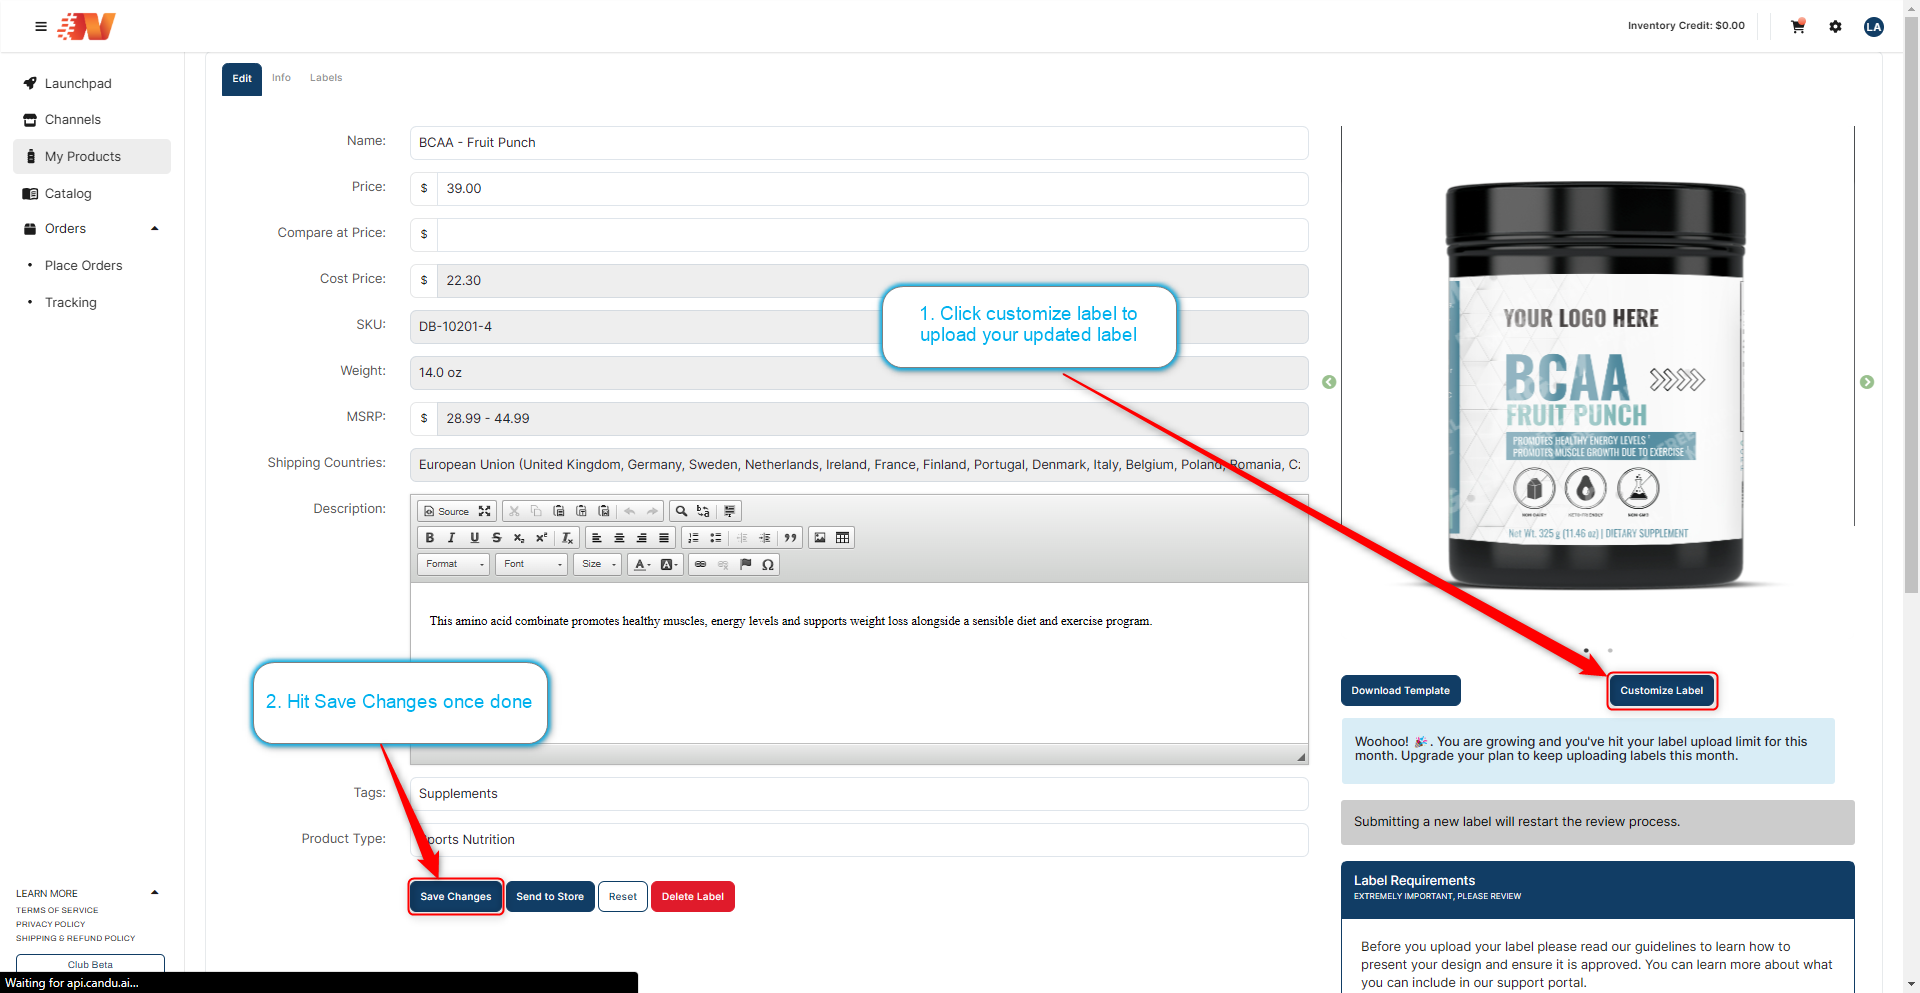
Important Note to Remember: Once your label has been submitted and approved, you will need to send that product to your store again by clicking "Send to Store" to sync your product with your updated label on it.
Create Multiple Versions of the Same Product (Layer Marketing)
To create a new variation of the same supplement, go back through the process starting at the Products Catalog page.
Note: If you have any further questions or need assistance, contact our Member Success Team through the live chat open Monday to Friday 9 AM - 5 PM ET. They will be delighted to assist you!
![]()