

Locating Variant Mapping and Creating Variants within your E-Commerce Store

Go to your E-Commerce Store and select the product you would like to create variants for. The Variants section can be found on the product page inside of your E-Commerce Store.
Click on Add Another Option. Depending on what your variants are, you will want to name them accordingly.
Once you have created your variants successfully, you can now go back to your Next Day Nutra™ Dashboard.
Where to find Variant Mapping within your Next Day Nutra™ Dashboard for a specific Product
Go to My Products on the side menu.
Click on the Connected tab.
Choose the selected sales channel that has the product that you created variants for.
Click on the product thumbnail.
How to use Variant Mapping within your Next Day Nutra™ Dashboard for a specific Product
Next to the Edit tab, you will see the 'Connections' tab. In the Connections tab, you will find the Variant Mapping button that will bring you to the Variant Mapping page.
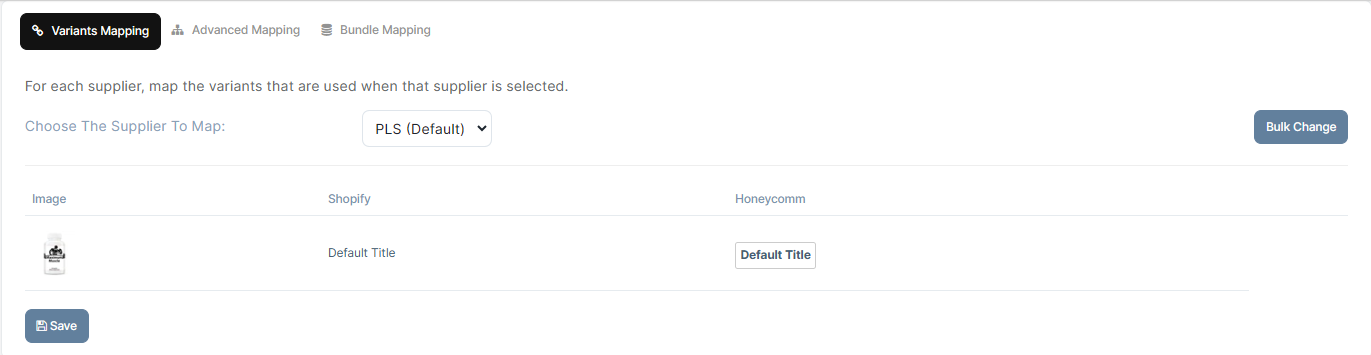
Once you are inside the Variant Mapping page, you will have three tabs to choose from:

Variant Mapping: In this tab, you will see the name that you have selected for your variant in Shopify and you will be able to edit what that variant name looks like in Next Day Nutra™.
Advanced Mapping: This tab allows you to Select/Change your Supplier, Supplier Variance and Shipping Method. You can also edit your default supplier, which should be Next Day Nutra.
Bundle Mapping: Inside of the Bundle Mapping tab, you will be able to choose what products will be fulfilled when a customer selects a specific variant.
Using Bundle Mapping for a Variant that sends more of the same Product in a bundle
If you are choosing a Variant that is sending more of the same Product (quantity bundles), you can use Bundle Mapping!
Click the +Add Product button and choose the Product
Select the Variant and input the Quantity that should be sent when that Variant is selected.
Then click Save.
Using Bundle Mapping for a Variant that includes sending different Products in a bundle
Follow the same steps!
Click the +Add Product button and choose the other Product that you would like included.
Select the first Variant and input the Quantity that you would like to be fulfilled as a part of this Variant,
Then click Save.
You can continue to do this with as many products as you wish to create perfectly customized bundles for your custom target audiences. Once you are done setting up all of your variants for that Product, you can click Save.
Reviewing when a Customer selects a specific Variant on your Website
First you want to make sure that the appropriate quantity or the appropriate product bundle is mapped inside of the Next Day Nutra™ Dashboard.
You can complete this inside of the Bundle Mapping section of the Variant Mapping page, simply by adding the product under the selected variant and confirming the product and the quantity of that product that should be fulfilled when that variant is selected.
Note: If you have any further questions or need assistance, please don't hesitate to reach out. You can contact our Member Success Team through the live chat open Monday to Friday 9 AM - 5 PM Est, and they will be delighted to assist you.